Hard-framed carrier: improve the quality of your hike

  1. Share
0 0
Sky was a little over a year old when I was finally mentally prepared enough to try a long day hike. I felt confident in what I would need for a full day's hike: 15 diapers, first aid kit, water for a family of eight, food for three days, three outfit changes and rain gear. With everything I needed, I was concerned about having to carry everything I would need with me, a one-year-old and my overactive imagination. Sky was starting to get heavy and I was concerned about footing, so I wanted her on my back, but my buckle-style carriers weren’t prepared to stuff everything. I wasn’t sure I really wanted to carry Sky on my back and a backpack on front (sounded super awkward). Enter the hard-framed carrier. Hard-framed carrier: improve the quality of your hike by Jessica Featherstone for Hike it Baby 
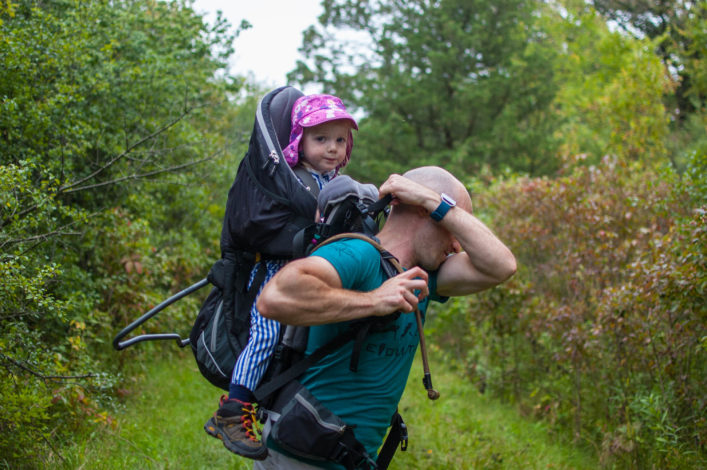
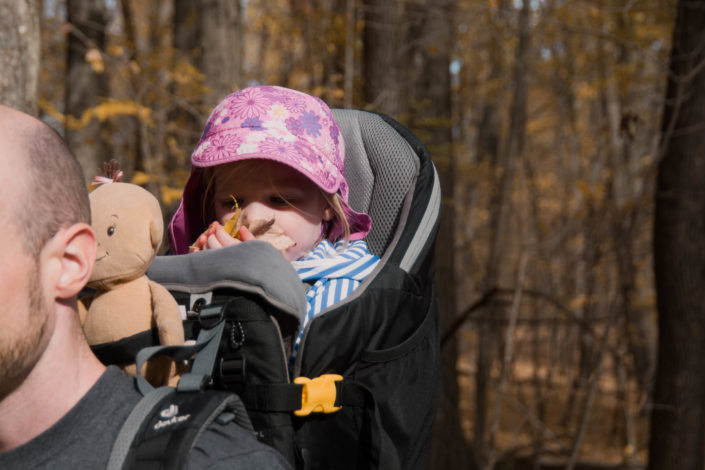
Hard-framed carriers (like my beloved Deuter Kid Comfort III) are typically designed to carry both gear and kids. Some don’t have gear compartments ... just skip those. A hard-framed carrier is different from your typical soft-framed carrier or buckle-style carrier. They have an internal frame so your little one sits higher behind you for a great view. Hard-framed carriers are designed to sit differently on your body above your hips, similar to a framed backpack and unlike the typical soft-framed carrier or buckle-style, which can sit anywhere from natural waist to hip.

A proper fit is important for comfort

Torso Length – Adjust your carrier so that the hip belt will sit on your hips and the weighted carrier’s shoulder straps won’t have a gap on your shoulders. Take the time before you head out on the trail to get this perfect for you. I grabbed a sack of potatoes and tossed it into the seat to get a great fit. I had my partner help me get the perfect fit by some trial and error on adjusting by using their Varifit system. Since it’s an easy strap to adjust, we also marked my partner’s best fit so we could go between the two of us easily. Waistbelt – Put it on your hips. It belongs there. Don’t think of this carrier like your typical Tula or Ergobaby carrier. It’s designed like a backpack and you have to think of adjusting it like that. Shoulder straps – Is there a gap? Is the bottom of the strap under your armpit? Tighten as needed to get your fit. It’s easier to loosen to get the pack on and off as well. Load Adjustment Straps – Those straps going from your shoulder to the pack? Those are the load adjustment straps and perfect for adjusting the pack either closer to you or farther away. Try playing with these as well to see what you like. Hard-framed carrier: improve the quality of your hike by Jessica Featherstone for Hike it Baby

Comfort for your kiddo

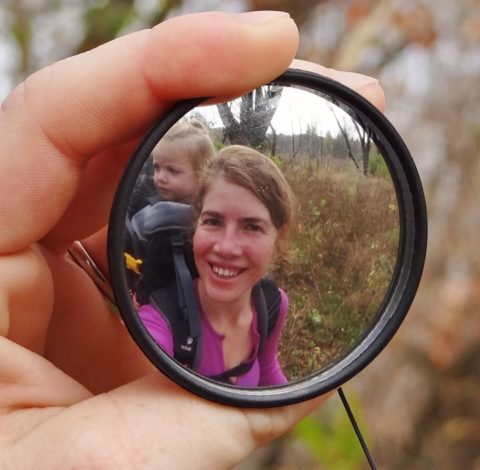
The hard-framed carriers are also designed with adjustments to help your little one feel comfortable as well. Seat – Look for the seat adjuster to get the right height. You want your child’s head to be above the front of the cockpit with their shoulders below the back rest. If you have a Kid Comfort III like me, I have my daughter periodically rest her head on the pillow so I can make sure she is comfortable when napping. Feet – Look for the stirrups and adjust these so your child’s knees are slightly bent. Harness – Make sure that the harness is snug against your child so they can’t wiggle out (I’ve learned this lesson for you.). Harnesses typically have several points to tighten so you can adjust to the child in that moment. The Deuter Kid Comfort III allows me to move the shoulder straps up and down, so Sky has a perfect fit. You want to make sure the harness is snug as this is what keeps your child in the cockpit. Accessories – If your carrier doesn’t come with it automatically, consider picking up a sunshade. I also highly recommend grabbing the rain protector as it’s very helpful for rain, snow and wind. You may also want to pick up a mirror like this one. It attaches to your carrier and will allow you to view your child. Hard-framed carrier: improve the quality of your hike by Jessica Featherstone for Hike it Baby

Extra tips for using a hard-framed carrier

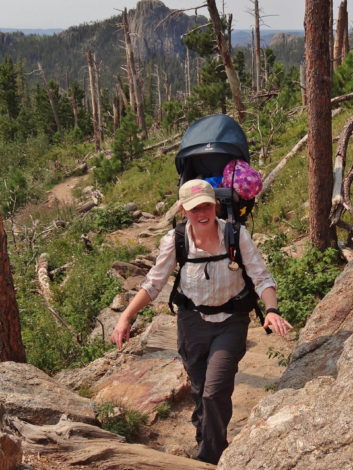
Your baby needs to sit independently. These carriers aren’t designed for kids who can’t sit independently, so don’t use it for newborns or any child who isn’t sitting independently. Each child hits this milestone in their own time. Mind the weight. Each framed carrier has a max weight it can safely carry to include the child, gear, water and the carrier. Sky is a little thing so we have been able to use this carrier for a long time. Each time I consider how much everything weighs (water is heavier than you think). If you are thinking about doing longer hikes and want to take gear along, a hard-framed carrier might be your perfect fit. For me and Sky, it’s allowed us to hike to the top of Black Elk Peak, backpack the Ice Age Trail, keep us on the trails longer and let me do more adult-paced hikes. Hard-framed carrier: improve the quality of your hike by Jessica Featherstone for Hike it Baby

Read more:

Photos by Jessica Featherstone. Do you have a fit tip for a hard-framed carrier? Let us know below!  

Community tags

This content has 0 tags that match your profile.

Comments

To leave a comment, login or sign up.

Related Content

0
How to Layer Yourself and Your Baby When Babywearing in the Cold
Winter is upon us, and as much as this weather makes us want to hibernate and never leave the house again, at some point, we have to venture out in the cold. And that might mean bringing baby with us, too. Babywearing is a great way to keep babies safe, dry, and warm in winter weather. Here's everything you need to know about layering when babywearing in the cold. Basics of Layering The most important thing you need to do is to maintain a normal body temperature for both baby and you. For the same reason you must put your own oxygen mask on first in a plane emergency, you need to have all your faculties to properly care (or wear) a child. So take care of yourself and make sure you are bundled up before you get baby ready. In the winter, both the cold and sweat are your enemies. Too cold and you risk health issues like hypothermia, frostbite, extreme dry eye pain, even trench foot.  Too many layers can cause you or your baby to overheat, leading to sweating (your body’s natural cooling-off mechanism). Once the sweat touches the cold air, you'll begin to cool down even faster, speeding up the cold risks mentioned above. The key to keeping both you and baby warm is layering. Wearing layers help trap in heat, keep the sweat away, and can be removed/added as needed to keep you both at the optimal temperature. Here is a wonderful infographic from an Antarctic travel site. In a nutshell, you and baby need a base layer to keep you from sweating, an insulation layer to keep you warm, and a waterproof layer to keep you dry and cover all your extremities. The layers can vary depending on the weather outside. For example, a raincoat would be perfect for a typically cool, drizzly Portland winter day but not warm enough for snow at Timberline. Here is an infographic from an outdoor sports retailer on layering for different temperatures. Now that you get the basic layering idea, you may be wondering how to apply this to your baby. The most important thing to remember when wearing in the cold is that the carrier counts as a layer. And, if you are using a wrap, multiple pass carries count as multiple layers. You need to adjust your layering accordingly. Less clothing or a different carrier may be necessary to keep a normal body temperature. For example, if it’s cool and rainy, a base layer, jacket, and a waterproof SSC is a good combination. If it’s snowing and windy,  base, insulating, outer, hats/gloves and a thick woven wrap in a double hammock would be a great option. Below are some examples of layering for a baby in different winter weather types. Cool When it’s above freezing, but not warm by any means. ​Or maybe it is freezing, but you aren’t going to be outside long; for example, running into the store. First photo: Base layer of a thicker long sleeve onesie and thick pants. Wool pants are a great choice. Second photo: Add warm gloves and socks. Third photo: Warm, but not bulky coat. Fleece and wool work well. Add a hat if no hood. Fourth: Carrier, no need for multiple passes. For a quick babywearing up, try a ring sling if you're just taking your baby out of the car seat and into a store. Total: 2 clothing layers, plus extremities covered, and one carrier layer. Cold When it’s cold, closer to freezing, and no precipitation. Making sure extremities are well covered will keep baby warm. First photo: Base layer of wool socks and a long-sleeve onesie. Second photo: Warmer layer, I did overalls, but a shirt and pants would be great as well. Wool is a great fiber for this layer. Third photo: Leg warmers/more socks over feet and legs to keep ankles from being exposed. Fourth photo: Outer layer of a fleece one-piece suit. Make sure it is on the bigger side so it doesn’t pull on baby’s feet in the spread-squat position. ​Fifth photo: Carrier, with multiple passes, as needed for warmth. Total: 3 clothing layers, extremities covered, and 1-3 carrier layers. Colder When it very cold or just above freezing, layers under a snowsuit are a great option. First photo: Base layer of a thicker onesie. Second photo: Warm pants and a long-sleeve shirt. Wool is a great fiber for this layer! Third photo: Leggings or long socks and gloves. Fourth photo: Warm, waterproof one-piece suit. Hand and feet covers. Make sure it’s a little on the bigger side for baby to move freely in the spread-squat position. Fifth photo: Carrier with multiple passes. Total: 3 clothing layers, plus extremities covered, and 2-3 carrier layers. Below freezing or snowing: When it’s below freezing and/or snowing. An extra insulation layer keeps baby warmer and a waterproof layer keeps you dry. First photo: Base layer long shirt, long pants, and socks. Second photo: Thermal shirt, warm pants, and thick socks. Wool is a great fiber for this layer. Third photo: Wool or fleece jacket. Fourth photo: Waterproof jacket, hat, boots (or covered feet for non-walking child), and gloves.  Waterproof pants are also a great addition if your child will be out of the carrier to walk. Fifth photo: Carrier that you don’t mind getting damp. A waterproof SSC is a great option, especially if your toddler might be getting out to walk occasionally. A woven wrap with multiple passes will add layers of warmth. Total: 4 layers of clothing, plus extremities covered, and 3 carrier layers. Now that you've learned how to layer for the cold, stay warm and wear those babies! Read more: Hard-framed carrier: improve the quality of your hike 5 Comfy and cozy winter carriers for babywearing How to carry supplies when hiking with a soft-structured carrier ABOUT OUTGROWN OutGrown is a 501(c)(3) nonprofit that works to create a world where everyone can enjoy the physical and mental benefits of spending time outside. We are focused on creating opportunities and removing barriers to access so families with babies and young children can take their first steps outside. We believe all families have the right to connect with nature, benefit from spending time outdoors and be inspired to a lifelong love of nature. Since its grassroots inception in 2013, OutGrown is a growing community of 280,000 families and over 300 volunteer Branch Ambassadors. More information on all of our programs can be found at WeAreOutGrown.org    EDITORS NOTE: We hope you enjoyed reading this article from OutGrown. We’re working hard to provide our community with content and resources that inform, inspire, and entertain you. But content is not free. It’s built on the hard work and dedication of writers, editors, and volunteers. We make an investment in developing premium content to make it easier for families with young children to connect with nature and each other. We do not ask this lightly, but if you can, please make a contribution and help us extend our reach.  
0
How to babywear in the rain
Oregon means rain. And a lot of it. Like six months or more of it. There is no escaping it. But that doesn’t mean you can’t wear your baby for half of the year here. Here are a few tips to babywear in the rain and keep you, baby and carrier dry! Don’t worry too much about your carrier. Mud washes out. Wet dries. It takes a lot to truly ruin a carrier. Even a silk woven wrap will probably be okay after a romp in the rain. That being said, if you have a very special carrier, it might be best just to leave it safe at home. Always make sure baby’s airway is unobstructed, so any hoods, covers, ponchos or whatever you use to keep dry must not cover baby’s face. Breathing is always more important than dryness. And never alter the design of the carrier or put added stress on it. No babywearing accessories should compromise the integrity of your carrier. Safety is also more important than dryness. Umbrella I know it’s very un-Oregonian to suggest this, but an umbrella is an effective and easy way to keep dry while babywearing in the rain. It’s also inexpensive. Just put on baby’s and your normal appropriate outerwear, pop open the umbrella and go! This is a good option for when it’s just sprinkling or raining on and off. Or when it’s not cold and there's no jacket trapping in body heat. If you get a large enough umbrella—like a golf umbrella—this makes a great option for tandem wearing. The downside is you need to hold it the entire time. It also may bounce around as you walk and may not always cover baby (especially in a back carry). If you are tandem wearing, you'll need to pay extra attention to keep both kids covered. And another thing to consider is that kids like to grab them and possibly whack you. Babywearing jacket A babywearing jacket is designed to accommodate baby and carrier. Some are even designed for tandem wearing. They either have an extra panel zipped in or are bigger, with a cutout or hood for baby’s head. Put baby in the carrier, put on the jacket and enjoy some hands-free wearing in the rain! However, there are a few downsides. First, they can be expensive (though they do come up for reasonable prices in co-ops often). You also need to make sure you get the right size for both you, baby (babies for tandem) and carrier. And keep in mind that baby will grow, so you may need to buy on the larger side so it lasts longer. They are not commonly found it stores, so trying on for sizing is not usually possible. ​ But most are wonderful at keeping you, baby and carrier dry, so once you get one you like and that fits, you won't regret it! Carrier Cover A carrier cover is a great way make sure baby and the part of the carrier in contact with baby stays dry. This is a piece of waterproof fabric that goes over the front of the carrier with a hood for baby. You still need to put a jacket over you and the back of the carrier (if your carrier isn’t waterproof). Put baby in carrier, put on cover, then your jacket, and enjoy come snuggles in the rain. Most buckle carrier brands make covers designed for their specific carrier. There are also generic ones that can work with most carriers as well, including wraps and ring slings. The downside is the cover is separate from you, so there is the risk of rain leaking in. Also, the cover doesn't go around your back, so the back of your carrier may get wet or you may still need a babywearing or larger jacket over your back. Keep in mind that they are designed to go on easiest for front carries. You can use them for back carries, but someone else may need to put it on for you, and you'll need to buy two of them. If all else fails, just put a waterproof coat on you, one on baby and dry your carrier later. A little water doesn’t hurt; it might even add to your fun! Just make sure baby doesn't get too cold, risking hypothermia. Keeping baby as dry as possible in a waterproof layer and snuggled close to your body should keep baby warm. For information on layering baby to stay warm for the cold, check our post on layering for the cold! Happy babywearing in the rain!!!! What kind of creative ways do you try to babywear in the rain? We'd love to hear your tips and tricks in the comments below. Read more: 5 Comfy and cozy winter carriers for babywearing Tandem babywearing tips - How to carry two small hikers How to layer when babywearing in the cold Photo by Amy Diebold. This post was sponsored by Onya Baby. ABOUT OUTGROWN OutGrown is a 501(c)(3) nonprofit that works to create a world where everyone can enjoy the physical and mental benefits of spending time outside. We are focused on creating opportunities and removing barriers to access so families with babies and young children can take their first steps outside. We believe all families have the right to connect with nature, benefit from spending time outdoors and be inspired to a lifelong love of nature. Since its grassroots inception in 2013, OutGrown is a growing community of 280,000 families and over 300 volunteer Branch Ambassadors. More information on all of our programs can be found at WeAreOutGrown.org    EDITORS NOTE: We hope you enjoyed reading this article from OutGrown. We’re working hard to provide our community with content and resources that inform, inspire, and entertain you. But content is not free. It’s built on the hard work and dedication of writers, editors, and volunteers. We make an investment in developing premium content to make it easier for families with young children to connect with nature and each other. We do not ask this lightly, but if you can, please make a contribution and help us extend our reach.