How To Make Your Own Pinhole Viewer for the Eclipse

  1. Share
0 0

Are you ready?

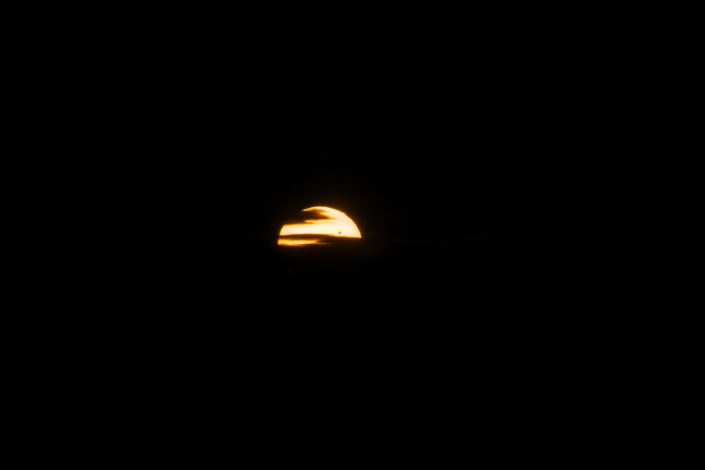
The United States is about to witness an amazing spectacle it hasn’t seen in over 45 years.  On Monday, August 21, 2017 a total solar eclipse will travel the expanse of North America, making its way from Salem, Oregon to Charleston, SC.  Witnessing an event like this is quite possibly a once in a lifetime experience for most people and if you live in the United States, chances are good that you’ll get to see it. To see how close you are to the path of totality (where a total solar eclipse can be seen), be sure to visit Nasa’s website.  Even if you can’t make it close to the direct path, you should be able to see a partial eclipse from almost anywhere in the United States.  Keeping your eyes protected when looking at the sun, however, is very important.  Never look directly into the sun!  Many people have opted to order special eclipse viewing glasses, but there is another option for viewing the eclipse that you can make yourself at home.  A pinhole viewer allows you to project the image of the sun onto a screen, protecting your eyes from the sun’s harmful rays.  This step-by-step guide will show you how you can make one yourself with supplies you may already have at home.  

Make a Pinhole Viewer

Supplies

Heavy Cardstock (Black is preferable) Toilet Paper Tube Black Paint and Paintbrush White Parchment Paper X-acto Knife or Sharp Cutting tool (Pocketknife, anyone?) Needle or Push Pin Black Electrical Tape Pinhole Viewer Template PDF

Step-by-Step Guide

  1. Paint the inside and outside of your Toilet Paper tube black and let dry. Alternately, some craft stores have extra thick cardboard tubes in fun colors that will block the light coming through.  No need to paint.
  2. Print out the Pinhole Viewer Template PDF onto your cardstock. If using black cardstock, you will want to choose a light-colored ink to make your print.
  3. Cut out the box template from your cardstock.
  4. Using an X-acto knife or other sharp cutting tool, carefully cut two slits in the cardstock cut-out where indicated.
  5. Using your needle or push pin, very carefully make a hole in the center of the X on your cardstock cut-out. This will be the lens for your pinhole viewer.  You want the hole to be as clean as possible and not too large.  For a cleaner hole, slowly twist the needle back and forth as you push it through.
  6. Fold along the dotted lines in order to make a box. Leave the top section open in order to secure the parchment paper.
  7. Carefully slide the parchment paper through the slits you created. It should stick out some on either side.  Close up the box once the parchment paper is in place and carefully pull the parchment paper tight.  You don’t want to pull too hard or it will break.
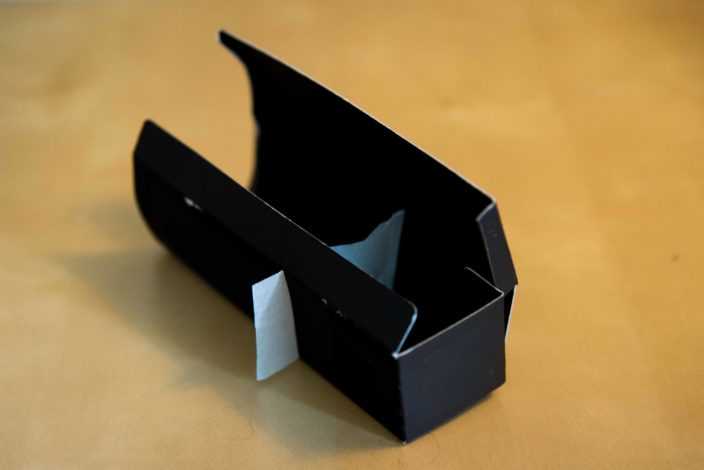
  8. Tape the box shut along the seams. You will want to tape everywhere there is a potential light leak, so along the sides of the front lens and all along the top seam.
  9. Tape the parchment paper to the side of the box on both sides so that it stretches flat inside the box. After the paper is secure tape around the slits enough times in order to ensure that no light can leak through.  When you are done, you should not see any of the parchment paper.  If you used white or light-colored cardstock you may want to tape around the entire box so that no white cardstock is showing.  This will also help make it more durable for little hands to use.
  10. Taking your index finger and thumb pinch four corners into the top of the toilet paper tube in order to form a square. This will allow us to put a circular tube into a square tube.
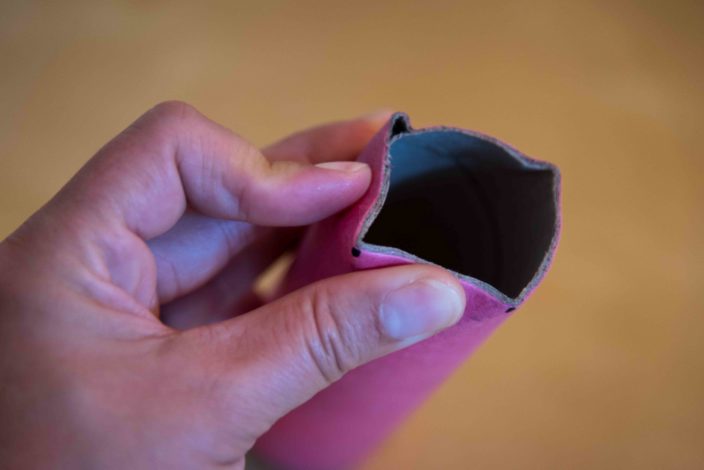
  11. Insert the toilet paper tube into the end of your box and tape all along the seam. Be generous with the tape here.  We don’t want any light leaks.
  12. Decorate your viewer how you like! Stickers are always a favorite for little hands.

Now that you’ve built your viewer its time to test it!

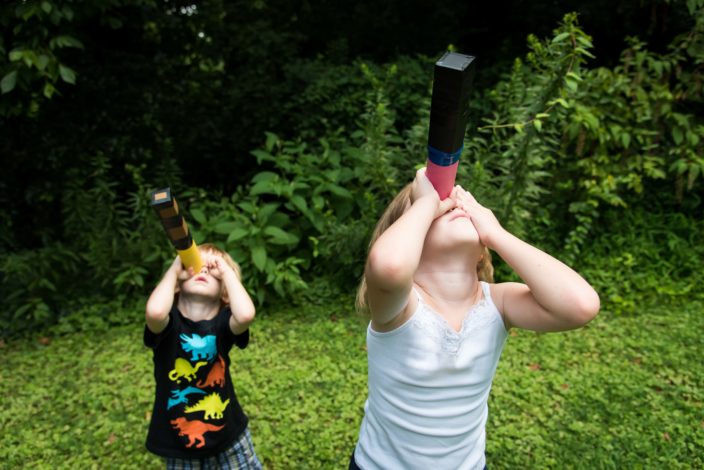
You will need to be in bright sunlight in order for it to work.  Using your hands to shield any light that might come through, bring the viewer up to your eyes and look out at the brightest object you can find.  The sun often works well for this.  As your eyes adjust to the darkness inside the tube you will start to see an image projected on the parchment paper in front of you.  You many notice that it is upside down!  This has to do with the way the optics of the pinhole lens work.  As the light-waves travel through the pinhole they are inverted and projected upside down at the other end.  When viewing the eclipse, however, this shouldn’t be very noticeable.

A Couple Safety Precautions for Viewing the Eclipse

Cover the other eye!  Since the pinhole viewer is for one eye be sure you have a hand up covering the other eye as you look towards the sun.  Another option is to wear an eye patch over the eye that’s not in use.  Pirate costume optional!  Never look directly at the sun without looking through the viewer.  Younger children may have difficulty keeping the viewer up to their eyes for the whole time they are looking at the sun.  Be sure to practice before-hand and decide whether or not your child can safely use the viewer to view the eclipse. How to Make Your Own Pinhole Viewer for Watching the Eclipse by Melissa Hollingsworth for Hike it Baby You can use a pinhole viewer to watch other stellar phenomenon, like the transit of Venus

Your Pinhole Viewer Can See Things Besides the Sun

On very bright days you will be able to see all kinds of things through your pinhole viewers.  Trees, buildings, cars passing down the street, birds flying in the air.  All will become visible on a bright day once your eyes adjust to the darkness inside the tube.  Be sure to have patience while your eyes adjust.  The view will be worth the wait!

Photos courtesy of Melissa Hollingsworth and Elliot Cook

Community tags

This content has 0 tags that match your profile.

Children

Comments

To leave a comment, login or sign up.

Related Content

0
Is Your City Involved in the 10 Minute Walk Initiative?
Have you heard about the 10 Minute Walk Initiative?! No? Well, if you think that increasing access to parks and green spaces can lead to better overall physical and mental health, especially during a health crisis, or that your overall quality of life would improve with close access to green space, then you’re already on board with this new program. Photo by Monique Vargas 10 Minute Walk Initiative The 10 Minute Walk Initiative aims to “...ensure that everyone in your city has safe, easy access to a quality park within a 10-minute walk of home by 2050.” That’s not just their mission for already more green-friendly places in the nation like California or Colorado, that’s their promise for the WHOLE COUNTRY. Check out their website to see if your mayor and your city are taking part and if you don’t see their name, do what I did and sign up to stay on top of how to get involved. Maybe you can even convince your mayor to take part. If you’re reading this you are already part of the growing Hike it Baby community and you know that a cornerstone of their mission is to Leave No Family Behind. If you’re changing a diaper, feeding your kid, having a meltdown (you or your kid!), if you can’t do the whole hike or if it’s your first hike we won’t leave you behind! This extends to race, sexual orientation, gender, disabilities, and language. This is of course still our mission but we have realized that many families are being left behind by default because they do not have access. This is unacceptable. We need to do better and that’s why Hike it Baby wholeheartedly supports the 10 Minute Walk Initiative. To ensure no family is left behind, we have to make sure that all families have easy access to safe parks and green spaces. OutGrown works to be the most effective hub of tools, information, and community inspiring all families with babies and young children to get outside and connect with nature. Learn more about OutGrown's mission and how you can get involved. ABOUT OUTGROWN OutGrown is a 501(c)(3) nonprofit that works to create a world where everyone can enjoy the physical and mental benefits of spending time outside. We are focused on creating opportunities and removing barriers to access so families with babies and young children can take their first steps outside. We believe all families have the right to connect with nature, benefit from spending time outdoors and be inspired to a lifelong love of nature. Since its grassroots inception in 2013, OutGrown is a growing community of 280,000 families and over 300 volunteer Branch Ambassadors. More information on all of our programs can be found at WeAreOutGrown.org  EDITOR’S NOTE: We hope you enjoyed reading this article from OutGrown. We’re working hard to provide our community with content and resources that inform, inspire, and entertain you. But content is not free. It’s built on the hard work and dedication of writers, editors, and volunteers. We make an investment in developing premium content to make it easier for families with young children to connect with nature and each other. We do not ask this lightly, but if you can, please make a contribution and help us extend our reach.
0
5 Tips for Trail Cleanup Safety
Winters can be hard on trails. Many will need both cleanup and maintenance come springtime. You can contact your local or state park system to see if they have anything planned, or you can plan your own trail cleanup hike with your Hike it Baby branch! Hike it Baby offers lots of information on organizing a trail cleanup, and safety is a consideration when participating in a trail cleanup. Some of these things may seem like common sense, but it’s always nice to double check your preparedness whenever you try something new (or for the first time in a while). 5 Tips for Trail Cleanup Safety 1. Bring proper cleanup supplies Certain supplies will come in handy during a trail cleanup. This would include gloves, trash grabbers and bags. It’s a good idea to have the littles carry the trash bag instead of picking up trash. They may not know what they should and shouldn’t touch. 2. Work in pairs or groups Sticking together and staying in communication with the organizer are very important. Make sure you have a charged cell phone or walkie-talkie with you. A compass could also come in handy if you're off the beaten path. Make sure someone knows exactly what area your group will be working in. Check in often with the organizer and stay close to your partner or group. Or, if you're hosting the hike, help the group stay together and communicate the meet up locations and times. 3. Bring your normal safety supplies All normal hiking injuries can occur on a trail cleanup. In fact, after winter, the trail will likely be in worse shape than usual, so be prepared. Make sure you pack your typical first aid kit, plus plenty of water and snacks. 4. Give the kiddos simple tasks The concept of trail cleanup is super important to share with our kids beginning at a young age as it teaches them to be stewards for our trails and parks. It’s even better to reinforce as they get older. That being said, not every trail cleanup is organized with young children in mind. If attending a hike organized by another group or parks department, speak to the cleanup organizer before deciding whether or not you will bring young children. Make sure there will be tasks suitable for their age and ability. With supervision and proper gloves and grabbers, tiny people are great at holding trash bags, spying trash, and they love to use trash grabbers! Older kids can also be great to pair with younger kids. If hosting your own hike, make sure you communicate what supplies to bring and provide safety tips during Welcome Circle. 5. Use caution Don't ever touch anything sharp or lift anything too heavy. While you will typically feel totally awesome after participating in a trail cleanup, you might not if you cut yourself and get an infection. After winter, there could be trees or large branches across the trail. Don’t try to be the hero and lift something too heavy on your own. Even professional bodybuilders use a spotter to lift. Bring a notepad with you and document anything you can’t handle. Then give this list to the trail cleanup organizer so that the proper crew can address it. (Or, if you're hosting, contact the parks department with the information.) For toddlers and little kids, have them spot the trash ("I spy!") instead of picking it up. This will ensure they aren't picking up anything dangerous or unsanitary. What are your safety tips for trail cleanup? Have a question about safety while participating in a trail cleanup? Leave a comment or a question below! Read More: 11 Tips for Safety on Trail 3 Trail Safety Tips You Must Know Photos by Vong Hamilton. Hike it Baby hikes are hosted by volunteers who have no professional training and are not experts to guide families on hikes. They are people who want to raise a generation to love the outdoors and they accomplish this by facilitating outings for all to join. Our tips are gathered from collective experience. As with any physical activity, please be sure to check with your healthcare provider and other experts when hiking with your children. ABOUT OUTGROWN OutGrown is a 501(c)(3) nonprofit that works to create a world where everyone can enjoy the physical and mental benefits of spending time outside. We are focused on creating opportunities and removing barriers to access so families with babies and young children can take their first steps outside. We believe all families have the right to connect with nature, benefit from spending time outdoors and be inspired to a lifelong love of nature. Since its grassroots inception in 2013, OutGrown is a growing community of 280,000 families and over 300 volunteer Branch Ambassadors. More information on all of our programs can be found at WeAreOutGrown.org    EDITORS NOTE: We hope you enjoyed reading this article from OutGrown. We’re working hard to provide our community with content and resources that inform, inspire, and entertain you. But content is not free. It’s built on the hard work and dedication of writers, editors, and volunteers. We make an investment in developing premium content to make it easier for families with young children to connect with nature and each other. We do not ask this lightly, but if you can, please make a contribution and help us extend our reach.