Hiking Essentials: Staying Safe on the Trail

  1. Share
0 0
“Hike safely!” These are the words that always come out of my mother’s mouth when I call her to relay the details of our next hiking adventure. But what does it mean to “hike safely”? We recently discussed the essential and recommended gear to bring on a hike (you can access the article here); but while the gear is a huge part of hiking safely, there is more to this concept than just bringing a bunch of stuff with you on a hike. That’s why in part two of our “Hiking Essentials” series, we tackle the topic of staying safe on the trail. We'll discuss general safety preparations first before diving into (and providing extra resources for) four of the main hiking safety concerns: injury, animals, potentially dangerous humans and weather.

Hiking Essentials Staying Safe on the Trail by Rebecca Hosley for Hike it Baby
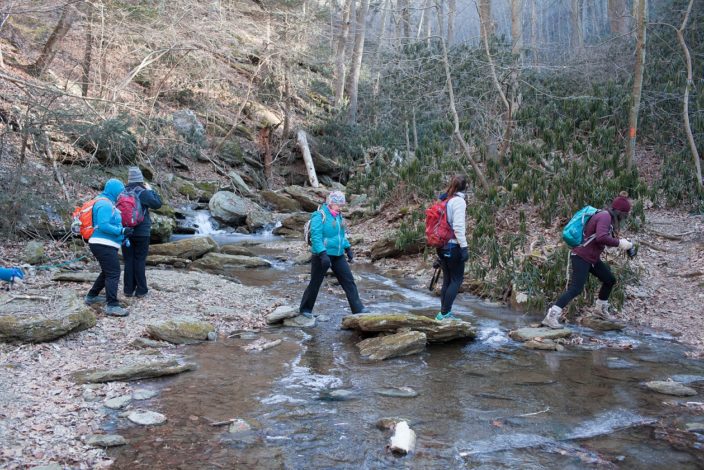
Photo by Kendra Reeder.

General Trail Safety Preparation

Both hiking enthusiasts and park officials generally recommend hiking in groups of two or more. This is especially important for hikes with higher mileage or elevation gain or if you are new to hiking. Staying in a group could be a life-saving decision should a dangerous situation arise during a hike. That being said, I can also see the appeal of the quiet serenity that can come with solo hiking. Regardless whether you prefer solo or group hiking, most safety concerns can be mitigated with the proper preparation and planning. This concept is illustrated by a study from the Journal of Travel Medicine that focused on the trends of search and rescue (SAR) deployment in U.S. National Parks. The authors of the study came to the conclusion that errors in judgment, fatigue/physical condition and insufficient experience, equipment and/or clothing were the most common contributing factors for SAR missions. The following are some general trail safety tips to help with the pre-hike preparation in order to help avoid dangerous situations. 1. Carry the essentials: Check out this article for a list of essentials and recommended items. 2. Research the area: While some trail surprises can make for fun memories (Who doesn’t love a hidden waterfall?!), others can turn a seemingly easy walk in the woods into a nightmarish experience. Take note to watch for things like expected elevation changes, the terrain, trail status, hunting season and wildlife. This can minimize unwanted surprises during the hike. It can also tell you if extra essentials are needed for your hike. These may include bear mace in bear country or bright orange clothing during hunting season. 3. Know the current terrain status: This can be especially important in the winter when cold temperatures and snow/freezing rain can completely change the terrain of a trail, making the use of micro-spikes or snowshoes a must. Spring and summer can also play havoc on a trail due to the overgrowth of plants. Here in the Southern Adirondacks, there are certain trails that are so overgrown at times that the use of bright tree markers is required if you want to bushwhack your way to a peak and not get lost on the way back down the mountain. 4. Always be aware of your surroundings: Try to avoid wearing earbuds or headphones or carrying a bluetooth speaker with you on a hike. It can be a pretty dangerous habit to have on the trail because many of the warning signs from potentially dangerous animals, other hikers and even weather changes (such as distant thunder) come in the form of sounds. The same goes for talking on the phone, texting and scrolling through photos while hiking since these distractions can prevent you from seeing tree roots, steep ledges and even animals (such as a snake sunning itself on the trail). 5. Know your limits: As I mentioned earlier, lack of experience, along with fatigue and physical condition, are among the most common reasons for a search and rescue team to be deployed. While I absolutely agree that pushing your limits can get you far, there is a fine line between going a bit farther than you did last week and pushing yourself to complete exhaustion. For example, I know that I tend to forget about my limits when I'm trying to keep up with more experienced hikers. This has put me in a difficult spot more than once. It took me passing out on the trail to realize that the only person I should be “competing” with is myself. From that point on, hikes have become more about the experience along the way rather than making it to a peak quickly.

Hiking Essentials Staying Safe on the Trail by Rebecca Hosley for Hike it Baby
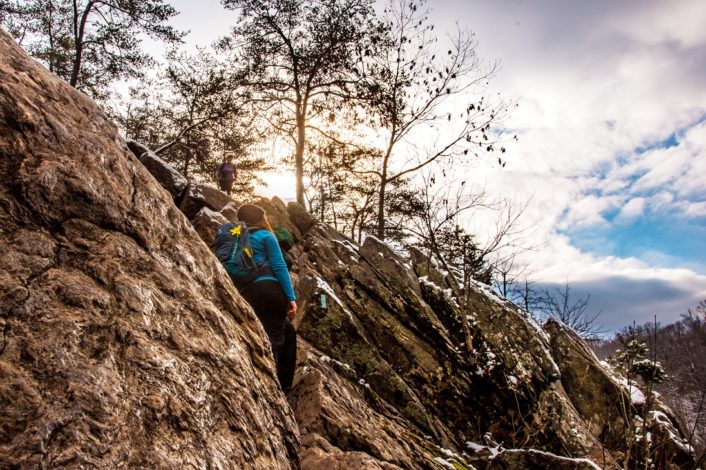
Photo by Jessica Human.

Injury

One of the biggest fears when hiking is the risk of injury. Did you know, though, that many hiking injuries can be avoided or easily treated with the proper preparation and gear? Here are some tips for preventing or treating some common hiking ailments: 1. Stretching once your muscles are warmed up can help prevent muscle cramps, lower back pain, foot arch pain, etc. I like to walk around the trailhead to warm up a bit before stretching. 2. Hydrating before and during a hike can help prevent headache, over-exhaustion, altitude sickness and stomach problems. 3. Wearing boots with ankle protection and using trekking poles can help prevent twisted or sprained ankles. It also helps stabilize you to prevent falls. 4. Wearing long sleeves and pants can help prevent sunburn, bug bites (especially if the clothing is treated with repellent) and contact with poison ivy or oak. 5. Carrying a well-stocked first-aid kit that includes things like moleskin (for blisters), insect sting-relief pads, pain-relief meds, etc., can treat most hiking-related injuries. While it is best to avoid injury, some mishaps will happen no matter how prepared you are (especially if you tend to be clumsy like me!). So what should you do if the injury is more severe and you cannot continue with your hike? These injuries could include broken bones or severe sprains, hypothermia (cooling of the core temperature below 95 degrees Fahrenheit), heatstroke, falls that result in loss of consciousness, etc. In these cases, you need to call in the big guns. Dialing 911 will connect you with the proper channels and get search and rescue teams to your aid. And although many hiking spots have little to no cell service available, attempting to call emergency services from your cell phone can leave a data trail for rescue services to find you. This is true even if your call didn’t go through. While it may take rescue teams longer to find you, it is an important reason to always carry a cell phone on hikes if you have one. If you tend to hike far from cell service on a regular basis, a better option may be to invest in either a Personal Locator Beacon (PLB) or a satellite messenger. Both of these devices use satellite-based technology to transmit messages to emergency services, though a PLB is designed to send out a distress signal while satellite messengers allow you to send short messages or your location coordinates. Check out this expert advice article from REI for more information on these devices. Are you looking to gain some wilderness first-aid skills? Check out this online course presented by Backpacker Magazine to learn how to handle medical problems and emergency situations in the wilderness.

Hiking Essentials Staying Safe on the Trail by Rebecca Hosley for Hike it Baby
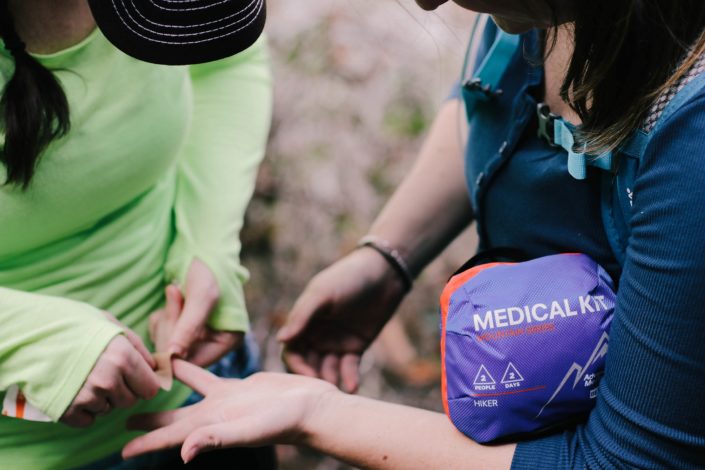
Photo by Kristin Hinnant.

Animal Encounters

When I think of animal risks on the trail, I’m always reminded of the saying at the end of every episode of the old G.I. Joe TV show from the ’80s: “Knowing is half the battle.” Each hiking area usually comes with a unique set of animals to watch out for. It might be black bears along the Colorado Front Range or timber rattlesnakes in the Southern Adirondacks. Knowing which potentially harmful animals are in your area is the first step to avoiding an encounter or determining what to do if one happens to cross your path. It’s a universal rule that you should never approach a wild animal (not exactly the opportune time for a selfie!). However, each animal comes with a unique set of signs to look out for and solutions for avoiding an attack. We have listed some of the most common wild animals to watch out for along with some helpful resources specific to each animal. 1. Bears: Living along the Front Range in Colorado, we tended to see black bears pretty frequently along trails and in neighborhoods foraging for food. Growing up, I remember one particular incident where a bear cub was digging through the trash can in our garage before mama bear fetched him to continue down the road into the woods. So what do you do if you encounter a bear on a trail? Here and here are a couple articles that discuss the signs to look out for, precautions to take and what to do should you encounter a bear while hiking in bear country. 2. Snakes: As much as they fascinate me, I also have a somewhat irrational fear of snakes because I have encountered numerous snakes while hiking. Almost all of them were non-venomous and way more interested in getting away from me rather than attacking. That said, knowing which species to look out for and what to do if you come across a venomous species while on the trail is extremely important. Check out these articles on the do’s and don’ts of hiking in rattlesnake territory and expert snake safety advice for more information. 3. Mountain lions: Also known as cougars, pumas and panthers, mountain lions are extremely widespread throughout the Western Hemisphere. That being said, it is generally rare to encounter a mountain lion on a hike. Here are some tips from the National Park Service for how to avoid an encounter and what to do should you come across a mountain lion on a hike. 4. Ticks: While ticks may not strike fear in your heart, the diseases they can transmit should. I live in an area that shows one of the highest occurrences of Lyme disease in the nation, so protection in the form of insect repellent, long sleeves and pants, and tick checks is very important. This article discusses important information on preventing, removing and testing ticks. PLEASE NOTE: It is important to report any animal sightings to park personnel, especially if the sightings occur close to the trail! Contact information can almost always be found at trailheads and parking lots.

Human Encounters

We have all heard stories of hikers being attacked by other people on trails around the nation. However, while there are no set statistics on violent crimes against hikers, the likelihood of being attacked by another human being on a trail is extremely rare. In fact, public lands tend to be much safer than the rest of the country. The risk of violent crimes is thousands of times lower than in the country as a whole. That said, there are a few precautions you can take to be prepared (and provide yourself some peace of mind) should you encounter someone with potentially questionable intentions: 1. Be wary of people who don’t “look like hikers.” For example, if you are on a lengthy hike and notice someone who appears ill-equipped for the terrain (such as lack of gear or inappropriate clothing), it may be best to give them plenty of distance. 2. Carry some items that can be used as weapons close at hand. This could include bear mace and/or a hiking knife attached to a belt loop or the outside of your hiking pack. Even trekking poles can make powerful weapons. Speaking from personal experience with an overzealous toddler, getting struck in the kneecap with a pole can be extremely painful (it was purely accidental on his part).

Weather Safety

Mother Nature is unpredictable. It isn’t possible to know with absolute certainty what she will throw your way on a hike. However, a little forward thinking can help prevent you from being left out in the cold, rain or heat. 1. Precautions for winter
  • Are you hiking over an area with a frozen body of water, but unsure of the safety of the ice? With large bodies of water, you'll want to be sure that the ice thickness has been tested before venturing onto it. However, when hiking in areas with frozen rivers, creeks, etc., you can test the ice yourself before putting your whole weight on it. Just remember the old saying: “Thick and blue, tried and true. Thin and crispy, way too risky.”
  • Be aware of snow squalls – periods of sudden moderate to heavy snowfall accompanied by strong surface winds (aka whiteouts). They can severely reduce visibility and create slippery surfaces. Most snow squalls are brief, so it is best to stay put if you are caught in one to avoid losing the trail and getting lost.
  • Frostbite can occur during prolonged exposure of the extremities to temperatures below freezing. It can range in severity from superficial redness to severe skin discoloration and blisters. If frostbite occurs, it is important to seek medical attention as soon as possible. Also, refrain from rubbing the affected skin, as this can cause further damage.
  • Are you hiking in an area that may be prone to avalanches? Check out this article to learn more about avalanche safety.
2. Precautions for summer
  • Start your hike early in the day when temperatures are lower, and cover up with long sleeves, pants and a hat. This may sound counterintuitive, but the less skin that is exposed to damaging UV rays, the better!
  • Hydrate well throughout your hike (especially if you tend to sweat a lot like I do) by sipping water often. Just be sure to avoid any chugging contests during your hike. Drinking too much water at once can actually do more harm than good because our bodies can only absorb about a half a liter of water every hour.
  • Since our bodies are losing more than just water when we sweat, eating the right snacks can make a huge difference! Replenishing lost electrolytes can be as simple as noshing on some trail mix or sucking down some carb and electrolyte-rich sports gels. Snack breaks are great times to chill out in the shade and give your muscles a chance to recover while also letting the evaporation of sweat cool down your body temperature.
  • Know the signs of heatstroke. This condition is caused by the overheating of the body, usually above 104 degrees Fahrenheit, as a result of physical exertion or overexposure to high temperatures. Symptoms of heatstroke may include confusion or agitation, severe headache, muscle cramps, nausea/vomiting, rapid heart-rate and/or breathing, and lack of sweating. Heat stroke can be deadly, and it’s important to find shade and cool down as soon as possible. Extra medical attention may be needed as well, so don’t hesitate to call in emergency services if needed!
3. Rain and thunder and lightning, oh my! The National Oceanic and Atmospheric Administration (NOAA) coined the term “When lightning roars, go indoors” for a reason, but what if you are out in the middle of nowhere when you hear it? Here are some tips for staying safe if thunder comes rumbling your way:
  • Watch for darkening clouds and increasing wind speeds, which could indicate an incoming thunderstorm. (The white, fluffy clouds are safe as long as they stay white and fluffy and don’t start growing upwards toward space!)
  • If possible, find a safe shelter that has four walls, a roof and wiring. (Camping lean-tos and picnic pavilions are NOT safe shelters.) A fully enclosed metal-topped vehicle is also considered safe, so if you are close to the parking lot, making a break for your car is the best bet!
  • If shelter is not an option, avoid open areas and bodies of water, immediately leave elevated areas (hills, peaks, etc.) and try not to be the tallest object in the area. Avoid tall or isolated trees, as well, as they tend to act as homing beacons for lightning strikes. Also stay away from objects that conduct electricity, such as barbed wire fences.
  • If you are hiking in a group, spread out. While this doesn’t decrease the odds that someone will get struck, it does help prevent multiple casualties so that help is available if someone is struck.
For more information on weather safety, check out this article on preparing for the unexpected while hiking for tips on how to stay prepared in case the weather turns during your adventure.

Read More:

What other safety tips or concerns do you have regarding hiking? Let us know in the comments below!
THIS ARTICLE IS WRITTEN FOR HIKE IT BABY AS AN INFORMATIONAL TOOL FOR READERS. WE ARE NOT EXPERTS IN THIS FIELD AND REFER READERS TO THEIR PERSONAL HEALTHCARE PROVIDERS WHEN SEEKING ADVICE ON MEDICAL MATTERS.

Community tags

This content has 0 tags that match your profile.

Comments

To leave a comment, login or sign up.

Related Content

0
Babywearing in the Rain
Does the thought of babywearing on rainy days sound like a daunting, seemingly impossible task? You’re not alone. When I was a Hike it Baby Branch Ambassador in the Pacific Northwest, we always saw a steep decline in participation once the rainy season started. However, once we started posting photos of hiking in the rain with a baby strapped to us, we started getting questions about how we do it: How do you keep your baby dry? How do you keep yourself dry? Doesn’t that ruin your carrier? And so on. Keep reading to find out the answers to these questions and more along with the benefits of hiking in the rain and tips from our amazing Hike it Baby community. Benefits of Babywearing in the Rain To help convince you it’s a good idea to hit the trail or pavement on rainy days, let’s start with some of the awesome benefits of getting your family outside in the rain: Fresh Air Fresh air is good for the body and the soul, rain or shine. It reduces stress, promotes better sleep, and can boost Vitamin D intake (yes, even on rainy days). If you live in an area that has long winters or rainy seasons, time in nature can help prevent and ease seasonal depression. To find out more about the benefits of getting out in nature, check out this article. Clouds and rain can make the temperature more bearable Clouds can have both a cooling and warming effect. On hot summer days, clouds can block the light and heat from the sun, making the temperature cooler. During the colder months, clouds can trap the heat from the sun, making the temperature warmer. Even with the added precipitation, you can enjoy milder outdoor temperatures, which can make a hike more enjoyable. Fewer Crowds Hiking is generally not the first activity that comes to mind on a rainy day for most people. However, fewer people on the trails makes for a more peaceful hike and more parking spots. I have found that a dreary day is the best time to visit the more popular hiking spots! Wildlife Spotting One of my favorite things about hiking in the rain is that you get to see critters you wouldn’t normally spot on a sunny day. Amphibians, such as frogs and salamanders, love the rain since their skin is sensitive to moisture. They usually hide or hang out near the water on hot, sunny days, but they come out to play when the rain clouds roll in. In addition, you’ll likely see plenty of slugs and snails, which are fun to watch as they slowly move across the path leaving trails of slime behind. A Lesson in Resilience Even as babies, our children are watching our every move and learning life lessons along the way. Showing them that you are willing to go through the effort to suit up and get out of the house regardless of weather will teach them that there’s no such thing as “bad” weather.  It shows that even though something is “hard” or takes effort and planning, it’s still worth doing. This mindset can help positively influence them as they grow and experience life. It’s Majestic There is something special and unique about hiking on rainy or wet days. The air smells fresh from the rain and soaked earth, the water droplets make the trees sparkle, and the sound of rainfall is soothing. It’s a delight for the senses! My older son would fall asleep in the carrier almost every time we hiked in the rain. Tips for Baby Wearing in the Rain Now that we know the benefits of getting out in rainy weather, let’s look at how it can be done safely, even with very young babies. Keep in mind that you always want to make sure that your baby’s airway is unobstructed, so be sure that any hoods, covers, etc. are not covering their face. Keeping Baby Warm and Dry The most important thing to remember about babywearing in the rain is to make sure your baby is warm enough (but not too warm). While babywearing, you will inevitably transfer some of your heat to baby. This can reduce the number of layers needed for both the baby and the adult wearing them. Check out this article for more information on how to layer when babywearing in chilly weather. Here are some tried and true tips and hacks for keeping your baby warm and dry from our wonderful Hike it Baby community. Invest in a Babywearing Jacket While they do come with a price tag, babywearing jackets allow you to take the guesswork out of keeping both you and baby warm. Many have both front and back carrying options, so it can grow with baby as they get big enough for a back carry. Check out this article on babywearing jacket options we love.  Love your own jacket? They even make zip-in panels that extend the size of your jacket to accommodate babywearing. “A waterproof babywearing jacket is a huge help! We have the Suse’s Kinder Deluxe, which zips apart to fleece and waterproof shell for mild weather, or you can put them together for truly cold weather. It has child panels for front/back/hip carries so it’s truly versatile.” – Gaila, Ames, IA Use a Multifunctional Carrier Cover Various companies make covers for baby carriers that keep baby warm and dry. Just be sure that the cover is listed as waterproof rather than water-resistant (unless you plan to double up on these hacks and use one of the next two options as well). Many of these covers can also be used as blankets, which is a huge bonus when you want to reduce the amount of baby “stuff” you have to lug around. “I wish the Jan and Jul company had their rain cover when my son was a baby because it's absolutely amazing and you can use it more than just with the baby carrier! The moms in our branch use it to change diapers by laying it on the ground then baby on top. You can use it as a waterproof blanket to protect and keep baby warm in their car seat, stroller, wagon, or wherever baby is!” –  Joey, Provo, UT Use Spare Rain Gear to Keep Baby Dry Not ready to invest in more gear? Why not use what you already have? This is one of our favorite hacks because it’s so simple and yet so effective! Many soft-structured baby carriers have straps that unbuckle, so all you have to do is unbuckle the straps, thread them through the arms of a rain jacket, buckle the straps again and you’re set! The rain jacket can also be tucked in around the carrier if the straps don’t unbuckle. Then, simply slip the hood over baby’s head, and voila! Baby stays dry and they can grow into the rain jacket. “Slip the straps of a carrier through a jacket to keep baby protected. It works with any size coat about 3T and up. I've done it with down coats and fleece on cold, dry days and with up to an adult size raincoat on wet days.. also makes for cute babywearing costumes.” – Nicholl, Portsmouth, NH” “Use an adult rain jacket to place over the child's head and the carrier if you are wearing them face first.” – Juliana, Fairbanks, AK Photo Credit Nicholl Summers And if All Else Fails, Bring an Umbrella There is nothing wrong with bringing along a collapsible umbrella in case of rain. This can give you peace of mind in case it starts raining more than predicted or if you are worried that baby will get too wet. They fold up neatly, and you can strap them to your carrier with a carabiner to keep your hands free when not in use. Keeping Yourself Warm and Dry If you’re like me, you tend to put the comfort of your child first and forget all about your own needs. However, coming prepared with the appropriate gear for yourself means you can stay out longer and go farther without dealing with discomfort from soaked shoes or soggy pants. Check out these tips for keeping yourself warm and dry on those rainy hikes. Waterproof Yourself At the bare minimum, make sure that you have a waterproof jacket and waterproof footwear. If it’s still chilly where you are, check out this article on layering for the whole family. If possible, buy some actual rain pants. You would be surprised how wet your pants can get while babywearing in the rain! “Rain pants for the babywearer for sure! And a big umbrella is what I usually do with a younger baby. Older kiddos get their own rain suit and I use a carrier like my Integra Solar that is made of quicker-drying material”. – Karole, Northern VA “I’m from Oregon, I always use rain pants for myself. Otherwise my butt and upper thighs would be soaked from the rain dripping off our rain gear”. – Tiffany, Oregon Borrow Rain Gear in a Larger Size Sometimes the easiest thing to do in a pinch is reach inside the closet of your spouse, father, or friend and borrow a rain jacket in a larger size. Just make sure it’s large enough to zip over yourself and your baby in their carrier but be sure it’s not covering your baby’s airway. “Borrowing my husband's rain jacket!” – Leah, Hampton Roads, VA Protecting Your Carrier The vast majority of baby carriers are machine washable, meaning that they won’t be ruined by getting soaked with rain. However, a wet carrier can get uncomfortable for the wearer along with the child (not to mention if you want to use the carrier again later in the day). Here are some tips for keeping your carrier dry while enjoying a rainy stroll. Purchase a Waterproof Carrier Cover Most carrier companies have waterproof covers that you can slip over the carrier to stay dry. They usually come with a hood to slip over baby’s head and an extra pocket you can slip your hands in to stay dry. You can also find generic brands online that work for most carriers. The Raincoat Hack I realize we already mentioned this hack, but it not only keeps your child dry, but it can also protect your carrier by covering both the body and the straps. “With a soft structure carrier where the straps unbuckle (Onya, Ergo, Kinderpack, etc.) you can slip a toddler size rain jacket over the straps and then you have a rain protected Carrier!” – Rachel, Charleston, SC Photo Credit Rachel Young Using these tips and hacks, “intolerable weather” can turn into yet another family adventure filled with memories and fun.  Do you have extra tips for babywearing in the rain? Let us know in the comments below. ABOUT OUTGROWN OutGrown is a 501(c)(3) nonprofit that works to create a world where everyone can enjoy the physical and mental benefits of spending time outside. We are focused on creating opportunities and removing barriers to access so families with babies and young children can take their first steps outside. We believe all families have the right to connect with nature, benefit from spending time outdoors and be inspired to a lifelong love of nature. Since its grassroots inception in 2013, OutGrown is a growing community of 280,000 families and over 300 volunteer Branch Ambassadors. More information on all of our programs can be found at WeAreOutGrown.org    EDITORS NOTE: We hope you enjoyed reading this article from OutGrown. We’re working hard to provide our community with content and resources that inform, inspire, and entertain you. But content is not free. It’s built on the hard work and dedication of writers, editors, and volunteers. We make an investment in developing premium content to make it easier for families with young children to connect with nature and each other. We do not ask this lightly, but if you can, please make a contribution and help us extend our reach
0
Creative Ideas to Celebrate the Winter Solstice with Young Children
What is the Winter Solstice? It’s beginning to feel a lot like winter in many places across the United States. The temperatures are dropping and the landscape has transformed into dull greens and browns as the deciduous trees are now mostly bare. Probably most noticeable of all are the short days and long nights. We are approaching the winter solstice (also known as Yule for some cultures). On this day we have the shortest day and the longest night of the year as one of the earth’s poles (the north pole for those of us in the northern hemisphere) tilts furthest away from the sun at 23.44 degrees. It also marks the first day of winter—December 21 in the northern hemisphere. Celebrating Winter and the Return of Light Celebrations of the winter solstice date back to ancient times. From Soyal, the winter solstice celebration of the Hopi Indians of northern Arizona to Dong Zhi, the “arrival of winter,” in China, people around the world observe the solstice in unique and special ways. Although it's the shortest day (and longest night) of the year, this important astrological occurrence is viewed by many cultures as the return of the sun. After all, the days grow in length and light starting on December 22. We think this transition from fall to winter on the longest night of the year is worth a celebration! Check out these activities, crafts and book recommendations to help your family celebrate the winter solstice. Activities Night Walks and Hikes: Nature transforms at night with different sights and sounds to experience. Winter offers the unique opportunity to partake in night events without having to throw the kiddos routine out the window. Check out this list for ideas on how to take advantage of the long nights of winter. Sensory Scavenger Hunt: Welcome winter with each of the five senses. Review this printable checklist or create your own based on your region. Create a winter nature table: Creating a space where your kids can place items that remind them of winter is a great way to kick off the season! It can be as small or big as you want, and the items that you place on it can vary widely. You can include pine cones, pine needles, twigs, winter crafts (see below), etc. Or better yet, following principles of “leave no trace”, you can take photos of these items in nature to include on your table. Read this article for more creative ways to enjoy the outdoors with your family this winter. Craft Ideas Stick Art: Sticks and pinecones are plentiful this time of year. Here are 4 easy winter crafts to make using materials you can find in your own backyard. Craft or Bake a Yule Log: The Yule Log tradition started as a medieval Nordic tradition. The yule log was lit as a symbol to entice the sun to return and lengthen the days again. Check out this article for a fun Yule Log craft. Looking to add some baking into your winter solstice celebration? Check out this recipe for a yummy Yule Log cake! Winter Solstice Lanterns: Bring light to the longest night of the year by creating a nature-inspired lantern. Books to Read As the saying goes, “A picture is worth a thousand words.” These beautifully illustrated books help children of all ages understand what happens as fall turns to winter — starting with the shortest day of the year. Birth - 3 Years Winter in the Forest By Rusty Finch - Follow two little raccoons as they learn about winter in the forest. Even the littlest kiddos will enjoy lifting the flaps to discover hidden surprises in the snowy landscape. Winter Board Book By Gerda Muller - This chunky board book shows the joys of winter through beautiful illustrations. This book is part of a four-part, no-text series on the seasons. One Short Day in December By Lilith Rogers - This fun book follows a deer family of two moms and their baby deer as they celebrate the Winter Solstice. 4 Years and Up The First Day of Winter By Denise Fleming - Follow a little boy as he discovers all the trimmings needed to make a perfect snowman. This cumulative tale will have children chanting along to the tune of “Twelve Days of Christmas” starting with the first day of winter. Goodbye Autumn, Hello Winter By Kenard Pak - Join a sister and brother as they greet the signs of winter while they explore nature and take a stroll through their town. The Shortest Day: Celebrating the Winter Solstice By Wendy Pfeffer - This book explains the science, history and cultural significance of the winter solstice in lyrical prose that kids can enjoy. How does your family celebrate the winter solstice? Let us know in the comments below!   Photos courtesy of Krystal Weir, Deanna Curry and Jessica Human. ABOUT OUTGROWN OutGrown is a 501(c)(3) nonprofit that works to create a world where everyone can enjoy the physical and mental benefits of spending time outside. We are focused on creating opportunities and removing barriers to access so families with babies and young children can take their first steps outside. We believe all families have the right to connect with nature, benefit from spending time outdoors and be inspired to a lifelong love of nature. Since its grassroots inception in 2013, OutGrown is a growing community of 280,000 families and over 300 volunteer Branch Ambassadors. More information on all of our programs can be found at WeAreOutGrown.org    EDITORS NOTE: We hope you enjoyed reading this article from OutGrown. We’re working hard to provide our community with content and resources that inform, inspire, and entertain you. But content is not free. It’s built on the hard work and dedication of writers, editors, and volunteers. We make an investment in developing premium content to make it easier for families with young children to connect with nature and each other. We do not ask this lightly, but if you can, please make a contribution and help us extend our reach.