
How to tandem babywear while hiking

More children means more trail buddies. The joy on their sweet little faces as they see the wonders of nature around your family. However, more children also means more tired little legs. You may need to enter the realm of tandem babywearing – wearing two children in carriers at once.
 Here are some general tandem wearing tips to get you started.
1. As always, the general rules of babywearing apply. If you would not do an activity while holding multiple babies, then it’s probably not a good idea to do it while tandem wearing. For example, climbing up a steep cliff.
2. The safest recommendation is one carrier per child. And each carrier should be secured independent of the other. This also means no crossing straps or tying one carrier to another. That way, you could safely remove one child quickly if needed without the risk of the other falling out.
3. Make sure both children meet the general height and weight limits of their carrier. This will ensure both you and babies are comfortable and well-supported without the risk of falling.
4. Make sure you are comfortable using each carrier independently first before trying them together. You need to be able to prep them, place baby on your body, secure the carrier and remove baby safely on your own.
5. Keep in mind that two babies/kids mean double the weight. Make sure you can physically carry that much weight before you head out on the trail. A mile into your hike is a bad time to realize that both kids are too heavy! Try it out at home first. Your living room or backyard is the perfect place to practice securing both children in the carriers. Take a short stroll around the room or neighborhood to ensure you’re comfortable and stable.
Here are some general tandem wearing tips to get you started.
1. As always, the general rules of babywearing apply. If you would not do an activity while holding multiple babies, then it’s probably not a good idea to do it while tandem wearing. For example, climbing up a steep cliff.
2. The safest recommendation is one carrier per child. And each carrier should be secured independent of the other. This also means no crossing straps or tying one carrier to another. That way, you could safely remove one child quickly if needed without the risk of the other falling out.
3. Make sure both children meet the general height and weight limits of their carrier. This will ensure both you and babies are comfortable and well-supported without the risk of falling.
4. Make sure you are comfortable using each carrier independently first before trying them together. You need to be able to prep them, place baby on your body, secure the carrier and remove baby safely on your own.
5. Keep in mind that two babies/kids mean double the weight. Make sure you can physically carry that much weight before you head out on the trail. A mile into your hike is a bad time to realize that both kids are too heavy! Try it out at home first. Your living room or backyard is the perfect place to practice securing both children in the carriers. Take a short stroll around the room or neighborhood to ensure you’re comfortable and stable.
 Baby and toddler
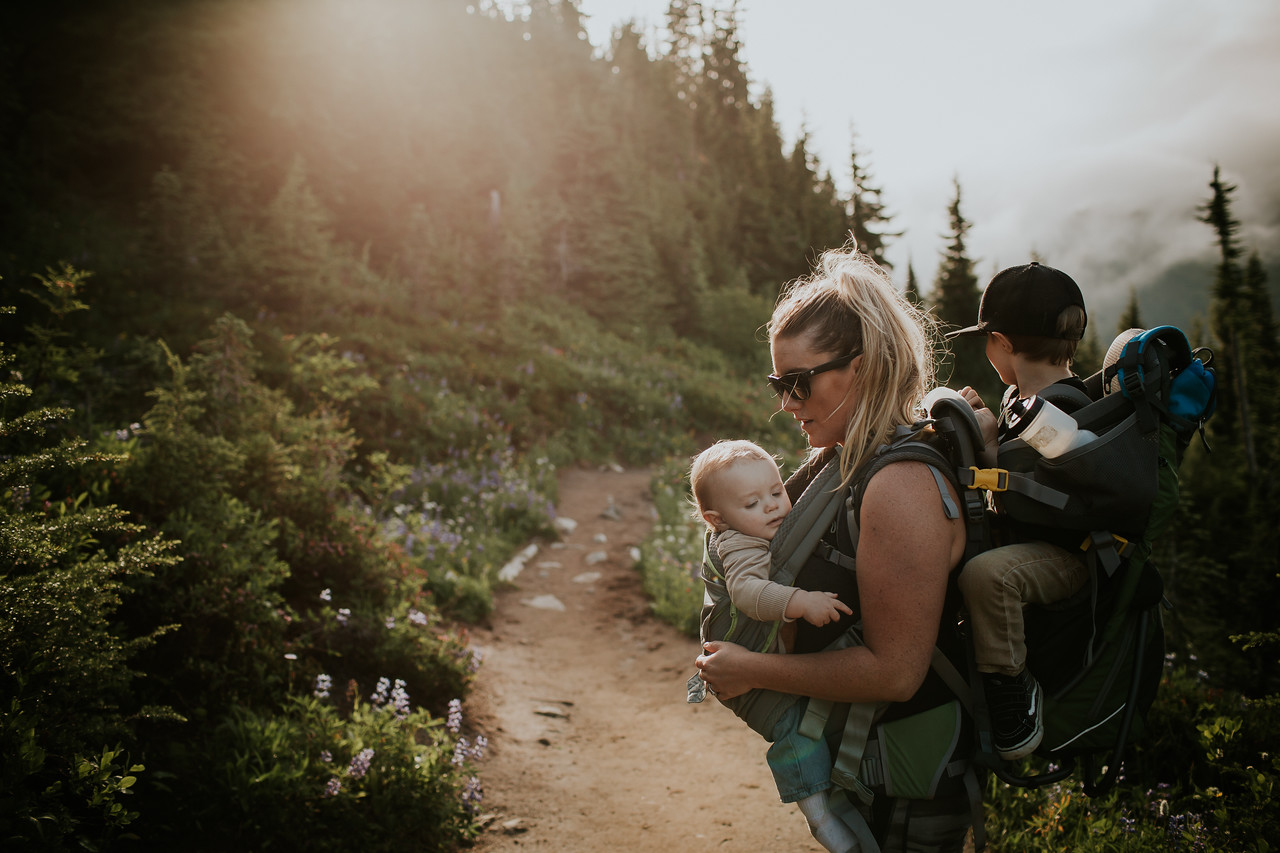
Whether hiking with siblings or you’re helping another parent during a hike, there may be times when it’s necessary to carry two kids of different sizes and weights. We recommend making it as easy as possible. If you have a newborn or infant, using a stretchy wrap on the front is convenient for taking baby in and out for diaper changes and feeding. Then you can wear any carrier you like on your back for the older child. Just make sure you put the wrap on first (even before you put baby in) so that way the back carrier is on top so the older child can go up and down as needed without disturbing baby.
Once your baby can sit upright unassisted, you can put either baby or toddler on your front or back and use any carrier you’d like! The best recommendation is still to wear the child who will want down the most on the front. However, keep in mind that it might be more comfortable to have your bigger child on your back. But keep in mind that testing out different positions and carriers at home before you hit the trail is your best bet for a successful tandem-wearing experience on the trail.
Share with us what you love about tandem wearing to encourage and inspire others to do the same.
Baby and toddler
Whether hiking with siblings or you’re helping another parent during a hike, there may be times when it’s necessary to carry two kids of different sizes and weights. We recommend making it as easy as possible. If you have a newborn or infant, using a stretchy wrap on the front is convenient for taking baby in and out for diaper changes and feeding. Then you can wear any carrier you like on your back for the older child. Just make sure you put the wrap on first (even before you put baby in) so that way the back carrier is on top so the older child can go up and down as needed without disturbing baby.
Once your baby can sit upright unassisted, you can put either baby or toddler on your front or back and use any carrier you’d like! The best recommendation is still to wear the child who will want down the most on the front. However, keep in mind that it might be more comfortable to have your bigger child on your back. But keep in mind that testing out different positions and carriers at home before you hit the trail is your best bet for a successful tandem-wearing experience on the trail.
Share with us what you love about tandem wearing to encourage and inspire others to do the same.
Here are some general tandem wearing tips to get you started.
1. As always, the general rules of babywearing apply. If you would not do an activity while holding multiple babies, then it’s probably not a good idea to do it while tandem wearing. For example, climbing up a steep cliff.
2. The safest recommendation is one carrier per child. And each carrier should be secured independent of the other. This also means no crossing straps or tying one carrier to another. That way, you could safely remove one child quickly if needed without the risk of the other falling out.
3. Make sure both children meet the general height and weight limits of their carrier. This will ensure both you and babies are comfortable and well-supported without the risk of falling.
4. Make sure you are comfortable using each carrier independently first before trying them together. You need to be able to prep them, place baby on your body, secure the carrier and remove baby safely on your own.
5. Keep in mind that two babies/kids mean double the weight. Make sure you can physically carry that much weight before you head out on the trail. A mile into your hike is a bad time to realize that both kids are too heavy! Try it out at home first. Your living room or backyard is the perfect place to practice securing both children in the carriers. Take a short stroll around the room or neighborhood to ensure you’re comfortable and stable.
Ways to tandem wear on the trail
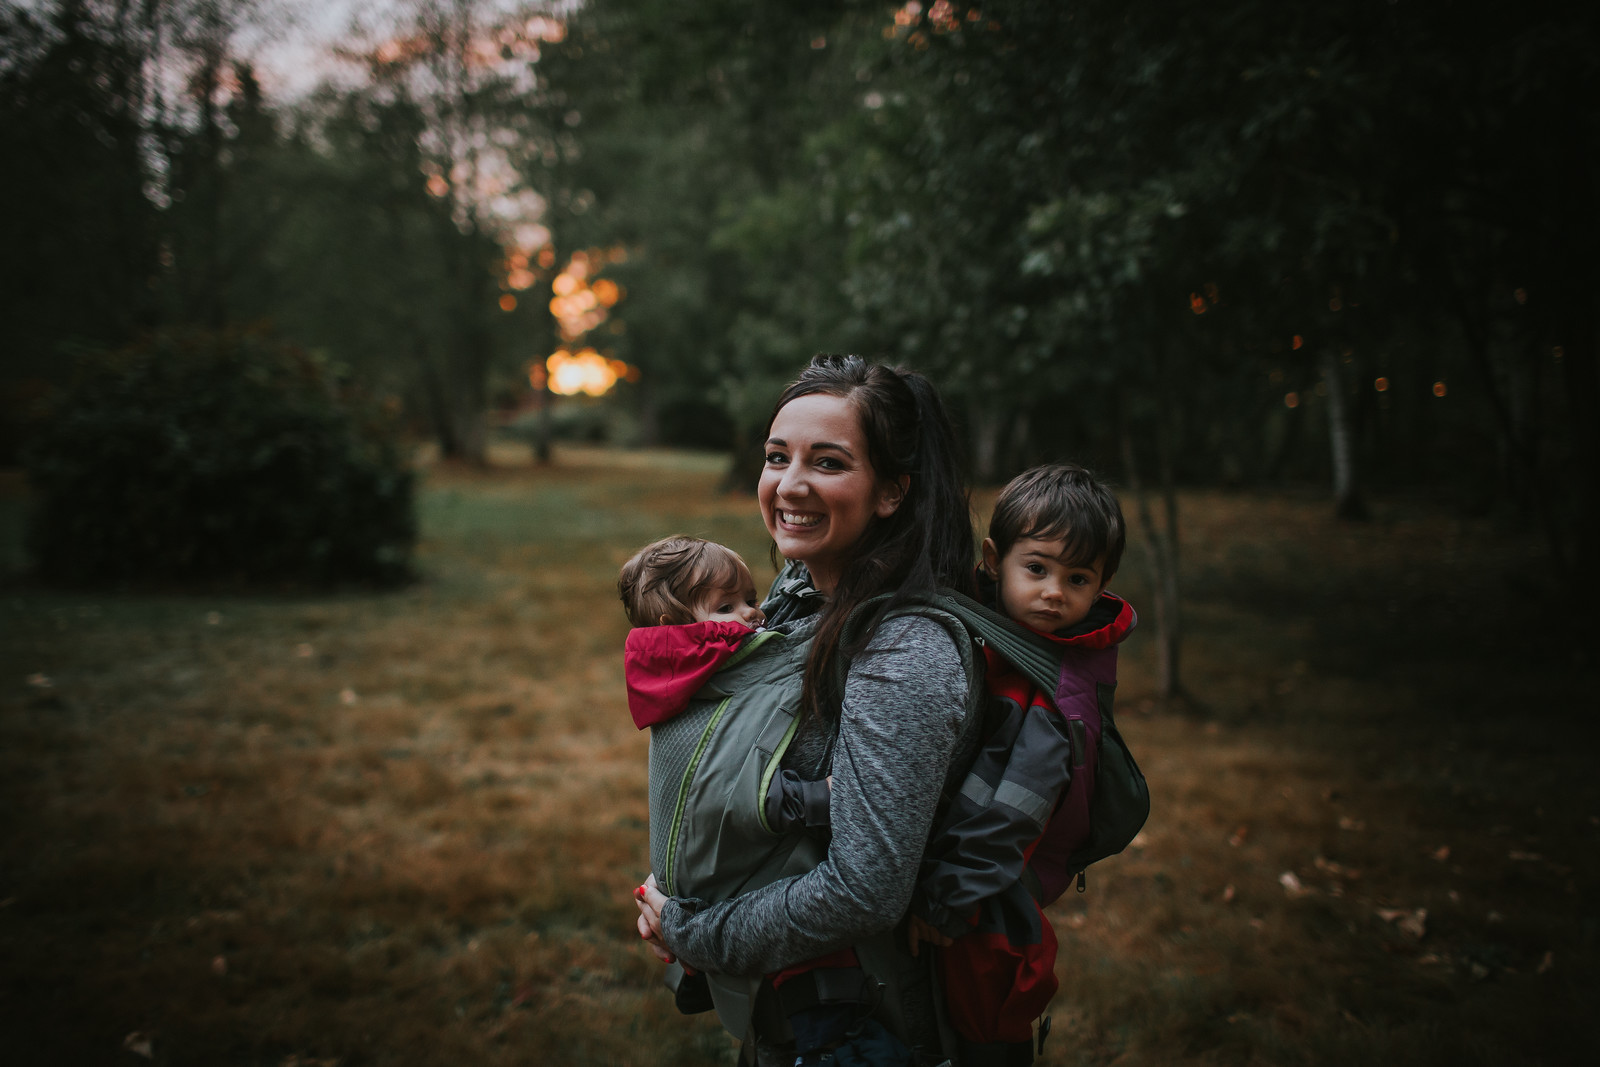
Babies of the same size For newborns, it is best to invest in a carrier that is designed for multiples. Many of these models are specially designed to fit newborns and will be the easiest way to get the proper fit for tiny babies. Please note that most twin carriers are designed to wear both newborns on the front only. This is the safest place for small babies, especially from first time wearers. And remember that babies need to be faced inward, but ensure their airways aren’t obstructed. Once babies get bigger, especially when they are sitting upright unassisted, you can try almost any two carriers you like together. The most common option is two soft-structured carriers, like The Extend from Easy Feel Products. Adjustable carriers, like The Extend, are also a wonderful choice for hiking with babies because the carrier grows with baby. The body panel adjusts in height and width to provide support and keeps baby snuggled from newborn to toddler. With practice, soft-structured carriers are easy to put on and adjust. Make sure both carriers function independently, so stagger the waistbands around your waist, one on top of the other, and ensure you can access both buckles and all shoulder straps easily. Toddlers of the same size As babies grow into walking toddlers or preschoolers, you’ll probably tandem wear less so you may be able to get away with just one carrier on a hike and rotate each kid as his legs get tired. But, there will probably be times when both kids will want to be carried too. Soft-structured carriers once again are a great choice, as they have more padding and internal structure to hold up more wiggles – especially from two kids. Keep in mind that those little legs may want back down again on the trail – and often – so try wearing the kiddo who usually wants down first on the front and place that carrier’s shoulder straps on the top. That way it’s a quick slide down your front and you don’t have to fight with trapped shoulder straps.
Baby and toddler
Whether hiking with siblings or you’re helping another parent during a hike, there may be times when it’s necessary to carry two kids of different sizes and weights. We recommend making it as easy as possible. If you have a newborn or infant, using a stretchy wrap on the front is convenient for taking baby in and out for diaper changes and feeding. Then you can wear any carrier you like on your back for the older child. Just make sure you put the wrap on first (even before you put baby in) so that way the back carrier is on top so the older child can go up and down as needed without disturbing baby.
Once your baby can sit upright unassisted, you can put either baby or toddler on your front or back and use any carrier you’d like! The best recommendation is still to wear the child who will want down the most on the front. However, keep in mind that it might be more comfortable to have your bigger child on your back. But keep in mind that testing out different positions and carriers at home before you hit the trail is your best bet for a successful tandem-wearing experience on the trail.
Share with us what you love about tandem wearing to encourage and inspire others to do the same.
Read more:
- Tandem babywearing tips - How to carry two small hikers
- Tandem babywearing on trail - Tips and Tricks
This post was sponsored by Easy Feels Products.
Related Content


Comments