Hiking with Young Infants: Tips and Tricks

  1. Share
0 0

Tallie shares her journey as a new mom. She talks about how hiking with infants is both doable and shares her tips and tricks with you. If you've been apprehensive about taking your baby hiking, this is the post for you.

Getting out of the house felt like life or death to me when cabin fever set in shortly after my baby boy’s arrival. I needed the November rain on my skin, breath of fresh air and no walls around me. I was craving a hike but my body wasn’t ready and needed time to heal after giving labor to our first little one.

Hiking with Young Infants: Tips and Tricks by Tallie K for Hike it Baby

Starting out slowly over the next few months, I began to take walks with my little one while giving myself time. Time to heal post-labor, regain strength and become comfortable as a new mom. Our outings started out to the mailbox, and spread to the end of the street and neighborhood loop. I patted myself on the back for taking the baby out for walks in different neighborhoods close to mine or downtown. It was exhilarating stepping outside the house and once again being independent, and not to mention confident in myself! I found much joy in introducing baby to the outside world and sharing sunshine, passersby, even rain! Living near Portland, OR, I was chomping at the bit to get out into the Columbia Gorge- one of my favorite places in the world! But that meant driving 45 minutes or more to a trailhead. Knowing my baby, this wasn’t an option yet for us even at three months old, nor was I comfortable driving that far with our precious cargo. Staying closer to home was more ideal. If he became fussy or had a dreaded diaper blowout, we could easily leave or turn around and head straight to home. We traded the gorge-ous scenery for a waterfront trail, park path, or downtown sidewalk.

Hiking with Young Infants: Tips and Tricks by Tallie K for Hike it Baby


At five months old, our little guy (or me?) was ready to venture outside our comfort zone and head out for an actual hike. One with wildflowers, viewpoints and more! Geared with a baby backpack carrier, snacks, a little water, and sunscreen, we were ready. Our group’s destination: Hood River. I thought we could try a great loop trail for us to try outside of town. The was trailhead located along a dirt logging road. Note: emphasis on the try. I tried to find the trailhead, but failed to do so. We didn’t drive two hours to not hike, so we made lemons out of lemonade. While looking for the trailhead, we met some mountain bikers exiting another trail who recommended the trail they just biked. Why not give this a try? With spontaneity, we set out on this unknown trail. It felt GREAT to be out in the sunshine, taking in the views of Mt. Hood and the Columbia River, and sharing nature. Our outing didn’t last long, just a couple hours, but it was perfect. Hiking with Young Infants: Tips and Tricks by Tallie K for Hike it Baby
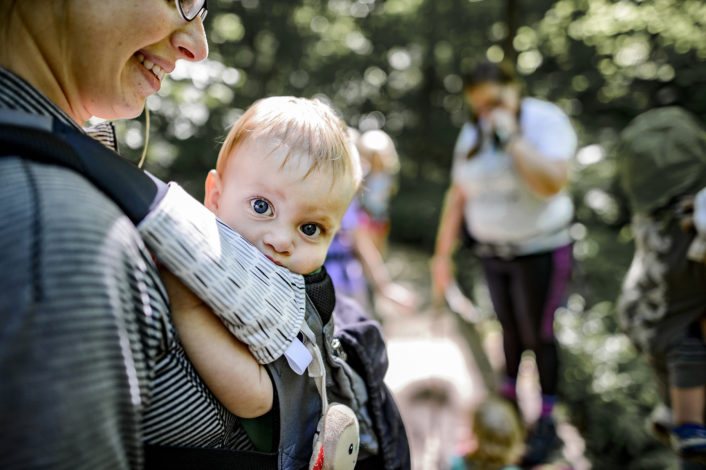
Our hikes this past summer with our infant has taught us to plan for the unexpected, yet be flexible. 

Quick and Helpful Tips for Hiking with Infants

  • Keep your diaper bag well stocked and include hand sanitizer, sunscreen, hat for baby, and extra baby clothes.
  • Get used to changing your infant’s diaper in your vehicle. When they gotta go, they gotta go!
  • It’s ok to turnaround and head home. Fussiness happens.
  • Bring plenty of water and snacks! Especially if you’re nursing.
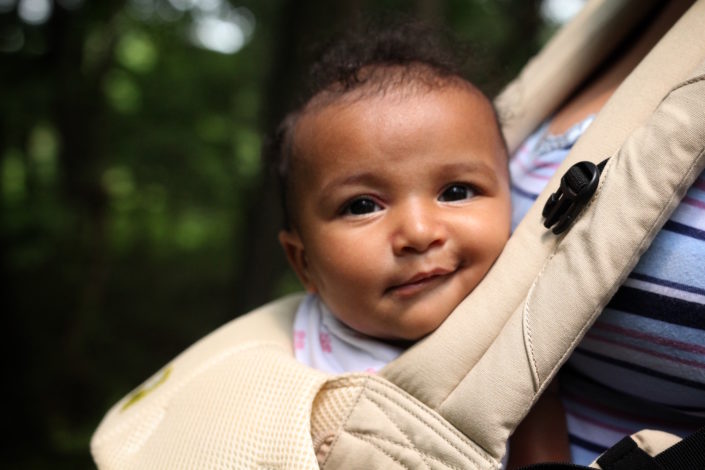
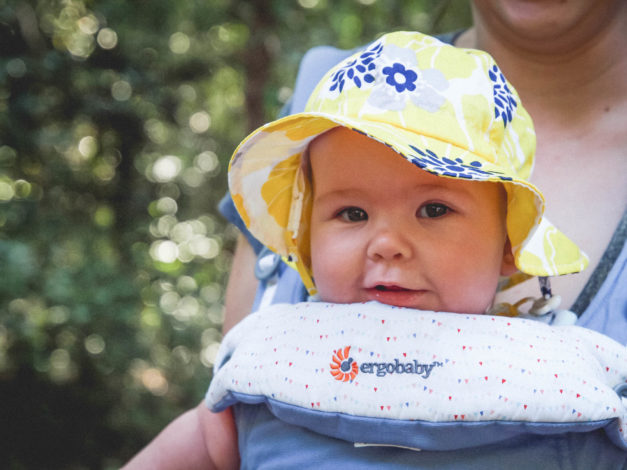
  • Use a comfortable baby carrier, for both baby and you. For us, we use the stroller around town, Ergo baby carrier for short walks, and our Deuter baby carrier for hikes.
    • In order to accommodate the baby carrier, check out these great zip in options from Zipusin. These allow you to use the jacket you already have but expanded for pregnancy or babywearing.
  • Read reviews for difficulty and conditions for hikes. This is handy, I like to stick to easy and moderate with our babe.

What are some of your tips for getting out with your young infants? Share with us in the comments below. 

Tallie lives in Southwest Washington and is currently navigating the ups and downs of raising a soon-to-be toddler. She loves spending time outside with her growing family and exploring new places. Outside of enjoying nature, her passions include reading, travel, photography, and DIY projects and crafts.

Photos courtesy of Ali Chandra, Kristin Hinnant, and Laura Castro

This post is sponsored by Zipusin. Hike it Baby was compensated for inclusion in this post. All opinions are our own.


ABOUT OUTGROWN

OutGrown is a 501(c)(3) nonprofit that works to create a world where everyone can enjoy the physical and mental benefits of spending time outside. We are focused on creating opportunities and removing barriers to access so families with babies and young children can take their first steps outside. We believe all families have the right to connect with nature, benefit from spending time outdoors and be inspired to a lifelong love of nature. Since its grassroots inception in 2013, OutGrown is a growing community of 280,000 families and over 300 volunteer Branch Ambassadors. More information on all of our programs can be found at WeAreOutGrown.org 


EDITORS NOTE:

We hope you enjoyed reading this article from OutGrown. We’re working hard to provide our community with content and resources that inform, inspire, and entertain you.

But content is not free. It’s built on the hard work and dedication of writers, editors, and volunteers. We make an investment in developing premium content to make it easier for families with young children to connect with nature and each other. We do not ask this lightly, but if you can, please make a contribution and help us extend our reach.


Community tags

This content has 0 tags that match your profile.

Comments

To leave a comment, login or sign up.

Related Content

0
How to Layer Yourself and Your Baby When Babywearing in the Cold
Winter is upon us, and as much as this weather makes us want to hibernate and never leave the house again, at some point, we have to venture out in the cold. And that might mean bringing baby with us, too. Babywearing is a great way to keep babies safe, dry, and warm in winter weather. Here's everything you need to know about layering when babywearing in the cold. Basics of Layering The most important thing you need to do is to maintain a normal body temperature for both baby and you. For the same reason you must put your own oxygen mask on first in a plane emergency, you need to have all your faculties to properly care (or wear) a child. So take care of yourself and make sure you are bundled up before you get baby ready. In the winter, both the cold and sweat are your enemies. Too cold and you risk health issues like hypothermia, frostbite, extreme dry eye pain, even trench foot.  Too many layers can cause you or your baby to overheat, leading to sweating (your body’s natural cooling-off mechanism). Once the sweat touches the cold air, you'll begin to cool down even faster, speeding up the cold risks mentioned above. The key to keeping both you and baby warm is layering. Wearing layers help trap in heat, keep the sweat away, and can be removed/added as needed to keep you both at the optimal temperature. Here is a wonderful infographic from an Antarctic travel site. In a nutshell, you and baby need a base layer to keep you from sweating, an insulation layer to keep you warm, and a waterproof layer to keep you dry and cover all your extremities. The layers can vary depending on the weather outside. For example, a raincoat would be perfect for a typically cool, drizzly Portland winter day but not warm enough for snow at Timberline. Here is an infographic from an outdoor sports retailer on layering for different temperatures. Now that you get the basic layering idea, you may be wondering how to apply this to your baby. The most important thing to remember when wearing in the cold is that the carrier counts as a layer. And, if you are using a wrap, multiple pass carries count as multiple layers. You need to adjust your layering accordingly. Less clothing or a different carrier may be necessary to keep a normal body temperature. For example, if it’s cool and rainy, a base layer, jacket, and a waterproof SSC is a good combination. If it’s snowing and windy,  base, insulating, outer, hats/gloves and a thick woven wrap in a double hammock would be a great option. Below are some examples of layering for a baby in different winter weather types. Cool When it’s above freezing, but not warm by any means. ​Or maybe it is freezing, but you aren’t going to be outside long; for example, running into the store. First photo: Base layer of a thicker long sleeve onesie and thick pants. Wool pants are a great choice. Second photo: Add warm gloves and socks. Third photo: Warm, but not bulky coat. Fleece and wool work well. Add a hat if no hood. Fourth: Carrier, no need for multiple passes. For a quick babywearing up, try a ring sling if you're just taking your baby out of the car seat and into a store. Total: 2 clothing layers, plus extremities covered, and one carrier layer. Cold When it’s cold, closer to freezing, and no precipitation. Making sure extremities are well covered will keep baby warm. First photo: Base layer of wool socks and a long-sleeve onesie. Second photo: Warmer layer, I did overalls, but a shirt and pants would be great as well. Wool is a great fiber for this layer. Third photo: Leg warmers/more socks over feet and legs to keep ankles from being exposed. Fourth photo: Outer layer of a fleece one-piece suit. Make sure it is on the bigger side so it doesn’t pull on baby’s feet in the spread-squat position. ​Fifth photo: Carrier, with multiple passes, as needed for warmth. Total: 3 clothing layers, extremities covered, and 1-3 carrier layers. Colder When it very cold or just above freezing, layers under a snowsuit are a great option. First photo: Base layer of a thicker onesie. Second photo: Warm pants and a long-sleeve shirt. Wool is a great fiber for this layer! Third photo: Leggings or long socks and gloves. Fourth photo: Warm, waterproof one-piece suit. Hand and feet covers. Make sure it’s a little on the bigger side for baby to move freely in the spread-squat position. Fifth photo: Carrier with multiple passes. Total: 3 clothing layers, plus extremities covered, and 2-3 carrier layers. Below freezing or snowing: When it’s below freezing and/or snowing. An extra insulation layer keeps baby warmer and a waterproof layer keeps you dry. First photo: Base layer long shirt, long pants, and socks. Second photo: Thermal shirt, warm pants, and thick socks. Wool is a great fiber for this layer. Third photo: Wool or fleece jacket. Fourth photo: Waterproof jacket, hat, boots (or covered feet for non-walking child), and gloves.  Waterproof pants are also a great addition if your child will be out of the carrier to walk. Fifth photo: Carrier that you don’t mind getting damp. A waterproof SSC is a great option, especially if your toddler might be getting out to walk occasionally. A woven wrap with multiple passes will add layers of warmth. Total: 4 layers of clothing, plus extremities covered, and 3 carrier layers. Now that you've learned how to layer for the cold, stay warm and wear those babies! Read more: Hard-framed carrier: improve the quality of your hike 5 Comfy and cozy winter carriers for babywearing How to carry supplies when hiking with a soft-structured carrier ABOUT OUTGROWN OutGrown is a 501(c)(3) nonprofit that works to create a world where everyone can enjoy the physical and mental benefits of spending time outside. We are focused on creating opportunities and removing barriers to access so families with babies and young children can take their first steps outside. We believe all families have the right to connect with nature, benefit from spending time outdoors and be inspired to a lifelong love of nature. Since its grassroots inception in 2013, OutGrown is a growing community of 280,000 families and over 300 volunteer Branch Ambassadors. More information on all of our programs can be found at WeAreOutGrown.org    EDITORS NOTE: We hope you enjoyed reading this article from OutGrown. We’re working hard to provide our community with content and resources that inform, inspire, and entertain you. But content is not free. It’s built on the hard work and dedication of writers, editors, and volunteers. We make an investment in developing premium content to make it easier for families with young children to connect with nature and each other. We do not ask this lightly, but if you can, please make a contribution and help us extend our reach.  
0
Simple, Quick and Easy Outdoor Activities for Infants
We all know that it’s great to get kids outside and that nature play has a multitude of benefits, but sometimes getting out the door is difficult even if it’s just into your own backyard. If we at least have some idea of what we are going to do once we are outside, then we are one step closer. For infants, the actual activity really isn't as important as just giving your baby new experiences. These activities for infants are all simple, quick and easy and should be able to easily incorporated into your routine. Here are some activities for infants to 1-year-olds in the great outdoors: Hiking or Walking Outside From just about birth, you can start getting your baby outside to hike or walk with you. Whether they are in the stroller, baby carrier or just in your arms, and whether you are hiking a trail or just walking back and forth in the driveway, getting outside and moving is a beneficial experience for you and your little one. Tummy time, Reading or Playing Outside Bring your normal inside activities outside to the fresh air. Grab a blanket and some books or toys and take playtime outside instead of inside.  Even just napping or nursing your infant outside can feel like a new experience. Picnics What a better place to start your baby on new foods then outside? Sit them on a blanket and picnic together while they try out new foods and new ways of feeding themselves. Added bonus: cleanup for you doesn’t involve scrubbing floors, walls, windows or high chairs. If they still need support when sitting, try a “bumbo” type seat with a tray or just bring their high chair out with you. Sensory Play One of the key elements for development in babies is sensory play and the outdoors is filled with new things to explore and stimulate their senses. Let them crawl around in new terrains – grass, dirt, sand, leaves, etc. Let them pick up new materials – rocks, sticks, sand or mud. Just keep a careful eye to make sure their new finds don’t turn into their next picnic. Get dirty Don’t be afraid to let them get dirty! Let them squish the mud or scoot through the dirt or roll around in the grass.  If you don’t want to rush to the bath tub afterwards, then move right on to one of the next activities below… Water Play You can take them to a pool or body of water and take them in the water with you, or fill a few bowls with water and let them splash around with their hands. Don’t overthink it – babies thrive on simplicity. Playgrounds During off hours, when there are not many bigger kids around, playgrounds can be perfect places for babies to work on new large motor skills, such as crawling on new surfaces, pulling up and climbing. Bubbles Babies love bubbles. They are easy and cheap (if you are ambitious, you can make your own following this recipe) and you are sure to get some giggles! Balls  One of the best toys for little ones are different sized balls for them to push around and watch bounce.  Outside is the perfect place because there is nothing to hit and plenty of space. Feel free to experiment with different size balls. This will help with both gross and fine motor control. Walking Practice Once your little one starts trying to walk, bring them outside where there are less sharp edges and lots of softer surfaces for the inevitable spills. The only downside is that they may become more interested in a new discovery on the ground and may not get very far!   Photos Courtesy of Kirby Crawford, Ashley Scheider and Kim Ives What are your favorite outdoor activities for infants? Share in the comments below!     ABOUT OUTGROWN OutGrown is a 501(c)(3) nonprofit that works to create a world where everyone can enjoy the physical and mental benefits of spending time outside. We are focused on creating opportunities and removing barriers to access so families with babies and young children can take their first steps outside. We believe all families have the right to connect with nature, benefit from spending time outdoors and be inspired to a lifelong love of nature. Since its grassroots inception in 2013, OutGrown is a growing community of 280,000 families and over 300 volunteer Branch Ambassadors. More information on all of our programs can be found at WeAreOutGrown.org    EDITORS NOTE: We hope you enjoyed reading this article from OutGrown. We’re working hard to provide our community with content and resources that inform, inspire, and entertain you. But content is not free. It’s built on the hard work and dedication of writers, editors, and volunteers. We make an investment in developing premium content to make it easier for families with young children to connect with nature and each other. We do not ask this lightly, but if you can, please make a contribution and help us extend our reach.