Hiking-inspired Valentine's Day Craft

  1. Share
0 0
Hiking-inspired Valentine's Day craft by Jenyfer Pattonf for Hike it Baby In this day and age of over-processed everything, I struggle to find Valentine options that don't create sugar-rushed kids, trash or junk toys that just get thrown away. So I went in search of Valentine's Day craft ideas for some hiking-inspired options and found a creative idea from Wilder Child that is great if your child collects treasures from your backyard - of if you have feathers, rocks, nuts or shells around your home. 
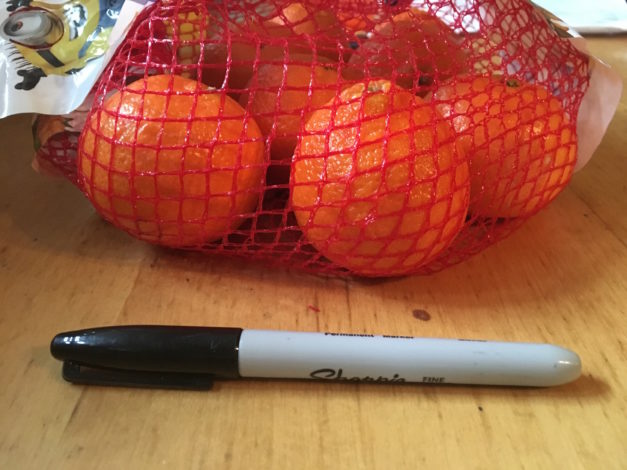
I took it a step further and wanted Valentines we could take hiking but that you wouldn't have to carry out (except the peels). I found a great pen that writes on pears and bananas. However, if you write on a pear, you have to make sure your markers are safe to ingest or buy edible ink markers. I'm not about tracking down a whole set of markers that I'll use once. I have tiny living goals and am training my brain to purchase strategically for that goal. One-use items don't usually count, which means I'm sticking to fruit with peels. Bananas are great but tend to get extra smooshed in our hiking packs ... so oranges it was!

How to Make Cutie Valentine's Day "Cards"

Hiking-inspired Valentine's Day craft by Jenyfer Pattonf for Hike it Baby 
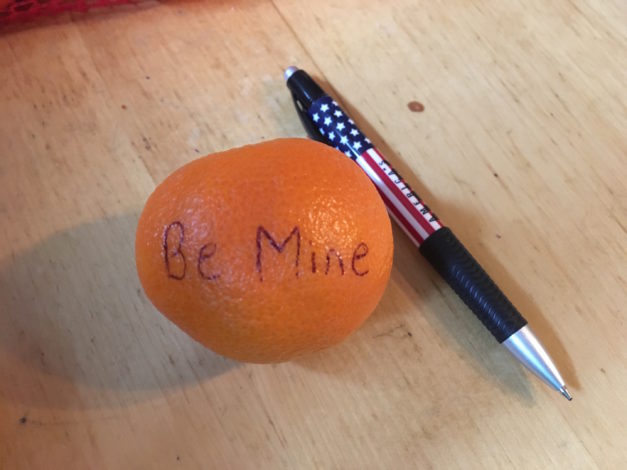
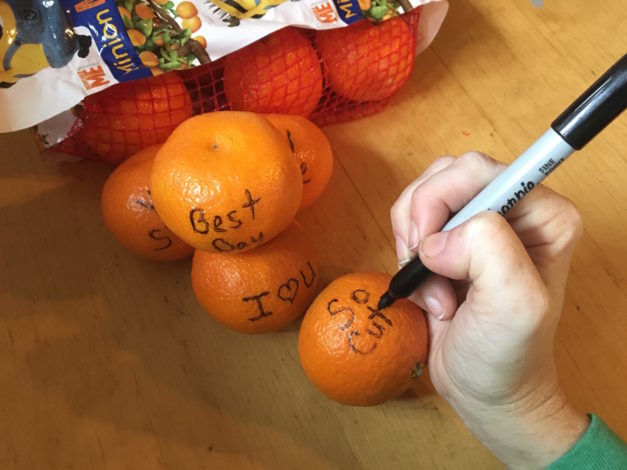
I first tried using a pen, but I didn't like the skinny lines, so I adjusted. With my sharpie all set, I went to work. Hiking-inspired Valentine's Day craft by Jenyfer Pattonf for Hike it Baby 
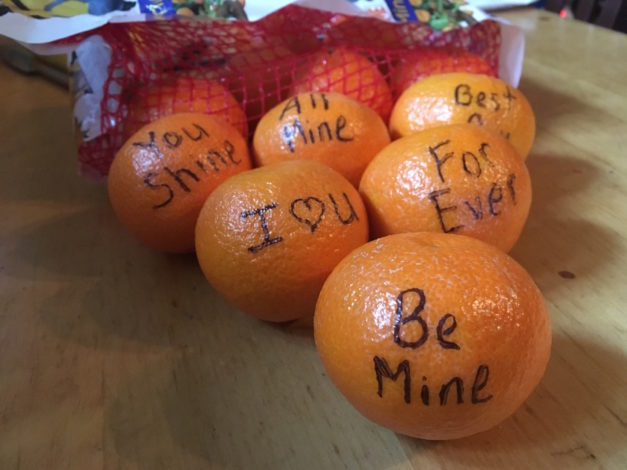
I looked up conversation hearts to pull a few sayings and got to writing. Hiking-inspired Valentine's Day craft by Jenyfer Pattonf for Hike it Baby Until I had a bag full of Valentine Wishes to hand out. Hiking-inspired Valentine's Day craft by Jenyfer Pattonf for Hike it Baby 
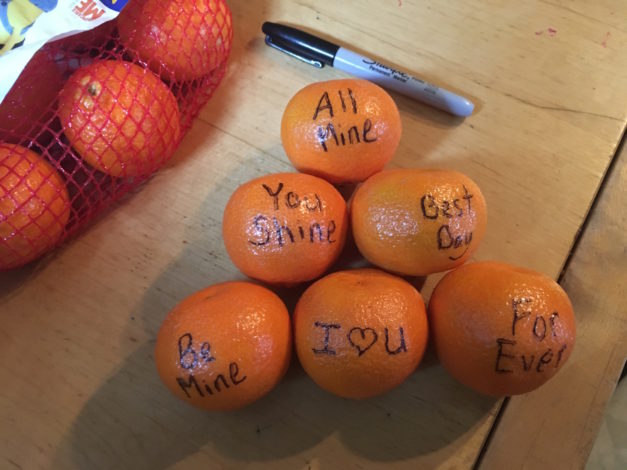
If you're more artistically inclined than I am, you could even use colors and add hearts and emoji faces to your collection of oranges. I did the whole bag in about 10 minutes. Success? I'd say so. Now we're ready to head out on a Valentine's Day hiking adventure with a special surprise treat to share. Happy hiking and Happy Valentine's Day!

Read More:

What are you planning for Valentine's Day? Let us know in the comments below. We love hearing from you.

Community tags

This content has 0 tags that match your profile.

Children

Comments

To leave a comment, login or sign up.

Related Content

0
How To Make Your Own Pinhole Viewer for the Eclipse
Are you ready? The United States is about to witness an amazing spectacle it hasn’t seen in over 45 years.  On Monday, August 21, 2017 a total solar eclipse will travel the expanse of North America, making its way from Salem, Oregon to Charleston, SC.  Witnessing an event like this is quite possibly a once in a lifetime experience for most people and if you live in the United States, chances are good that you’ll get to see it. To see how close you are to the path of totality (where a total solar eclipse can be seen), be sure to visit Nasa’s website.  Even if you can’t make it close to the direct path, you should be able to see a partial eclipse from almost anywhere in the United States.  Keeping your eyes protected when looking at the sun, however, is very important.  Never look directly into the sun!  Many people have opted to order special eclipse viewing glasses, but there is another option for viewing the eclipse that you can make yourself at home.  A pinhole viewer allows you to project the image of the sun onto a screen, protecting your eyes from the sun’s harmful rays.  This step-by-step guide will show you how you can make one yourself with supplies you may already have at home.   Make a Pinhole Viewer Supplies Heavy Cardstock (Black is preferable) Toilet Paper Tube Black Paint and Paintbrush White Parchment Paper X-acto Knife or Sharp Cutting tool (Pocketknife, anyone?) Needle or Push Pin Black Electrical Tape Pinhole Viewer Template PDF Step-by-Step Guide Paint the inside and outside of your Toilet Paper tube black and let dry. Alternately, some craft stores have extra thick cardboard tubes in fun colors that will block the light coming through.  No need to paint. Print out the Pinhole Viewer Template PDF onto your cardstock. If using black cardstock, you will want to choose a light-colored ink to make your print. Cut out the box template from your cardstock. Using an X-acto knife or other sharp cutting tool, carefully cut two slits in the cardstock cut-out where indicated. Using your needle or push pin, very carefully make a hole in the center of the X on your cardstock cut-out. This will be the lens for your pinhole viewer.  You want the hole to be as clean as possible and not too large.  For a cleaner hole, slowly twist the needle back and forth as you push it through. Fold along the dotted lines in order to make a box. Leave the top section open in order to secure the parchment paper. Carefully slide the parchment paper through the slits you created. It should stick out some on either side.  Close up the box once the parchment paper is in place and carefully pull the parchment paper tight.  You don’t want to pull too hard or it will break. Tape the box shut along the seams. You will want to tape everywhere there is a potential light leak, so along the sides of the front lens and all along the top seam. Tape the parchment paper to the side of the box on both sides so that it stretches flat inside the box. After the paper is secure tape around the slits enough times in order to ensure that no light can leak through.  When you are done, you should not see any of the parchment paper.  If you used white or light-colored cardstock you may want to tape around the entire box so that no white cardstock is showing.  This will also help make it more durable for little hands to use. Taking your index finger and thumb pinch four corners into the top of the toilet paper tube in order to form a square. This will allow us to put a circular tube into a square tube. Insert the toilet paper tube into the end of your box and tape all along the seam. Be generous with the tape here.  We don’t want any light leaks. Decorate your viewer how you like! Stickers are always a favorite for little hands. Now that you’ve built your viewer its time to test it! You will need to be in bright sunlight in order for it to work.  Using your hands to shield any light that might come through, bring the viewer up to your eyes and look out at the brightest object you can find.  The sun often works well for this.  As your eyes adjust to the darkness inside the tube you will start to see an image projected on the parchment paper in front of you.  You many notice that it is upside down!  This has to do with the way the optics of the pinhole lens work.  As the light-waves travel through the pinhole they are inverted and projected upside down at the other end.  When viewing the eclipse, however, this shouldn’t be very noticeable. A Couple Safety Precautions for Viewing the Eclipse Cover the other eye!  Since the pinhole viewer is for one eye be sure you have a hand up covering the other eye as you look towards the sun.  Another option is to wear an eye patch over the eye that’s not in use.  Pirate costume optional!  Never look directly at the sun without looking through the viewer.  Younger children may have difficulty keeping the viewer up to their eyes for the whole time they are looking at the sun.  Be sure to practice before-hand and decide whether or not your child can safely use the viewer to view the eclipse. You can use a pinhole viewer to watch other stellar phenomenon, like the transit of Venus Your Pinhole Viewer Can See Things Besides the Sun On very bright days you will be able to see all kinds of things through your pinhole viewers.  Trees, buildings, cars passing down the street, birds flying in the air.  All will become visible on a bright day once your eyes adjust to the darkness inside the tube.  Be sure to have patience while your eyes adjust.  The view will be worth the wait! Photos courtesy of Melissa Hollingsworth and Elliot Cook
0
A Thankful Tree
Looking for a way to infuse a little more gratitude into your family as we approach Thanksgiving this year?  There are so many wonderful ways to do that (thank you, Pinterest!), but in our family we have adopted the tradition of a Thankful Tree.  Every evening at dinner during the month of November we all think of one thing we are thankful for that day, write it on a tag, and hang it from a tree made of twigs collected from our yard.  We do it daily until the night before Thanksgiving, and often read over all the tags again on Thanksgiving Day. I love that our Thankful Tree inspires us to look for the good in our days, especially as we move into the difficult late fall season where days are shorter and everything turns gray.  I also love that we bring a bit of the outdoors in with our twig tree, which is a work of art by the end of the month with its colorful tags.  Interested in giving it a try?  It’s super simple to set up. Thankful Tree Instructions Here’s what you need: A large vase or jar A collection of thin sticks and twigs, the “branchier” the better 2 inch hole punch (or a circle template such as a small mason jar and a pair of scissors) A regular size hole punch Colorful fall scrapbook paper or construction paper A small box, mason jar, or basket to hold tags and pens Arrange your collected sticks into the shape of a tree, and place in your vase. Punch out enough circles for your family for the month.  We use 4 per day from November 1st until the night before Thanksgiving, which is November 23rd this year.  Some quick math tells me we'll need 92 tags, plus a few extras for mistakes or visiting family. Using the regular size hole punch, punch a small hole in each tag so you can later hang it directly on the branch. Place your tags and a pen into your box, jar, or basket and place it next to your tree in an easy to remember location. We place ours on the dining room table (makes a nice centerpiece!) Every day write one thing you are thankful for on a tag, and hang on the tree. Watch your beautiful tree, and your gratitude, grow! And that’s all there is to it!   It’s easy to involve the kids in this one (they love collecting the sticks!), and it’s also portable if your travel over the holidays.  One year we even brought a Ziploc bag full of the tags we’d already written, and all our blank ones yet to write on, with us to Grandma’s house.  A few branches from her yard in a borrowed vase, and we were back in business. How do you inspire thankfulness in your family this time of year?  Share with us in the comments below!