How to find the right fit with a frame carrier

  1. Share
0 0
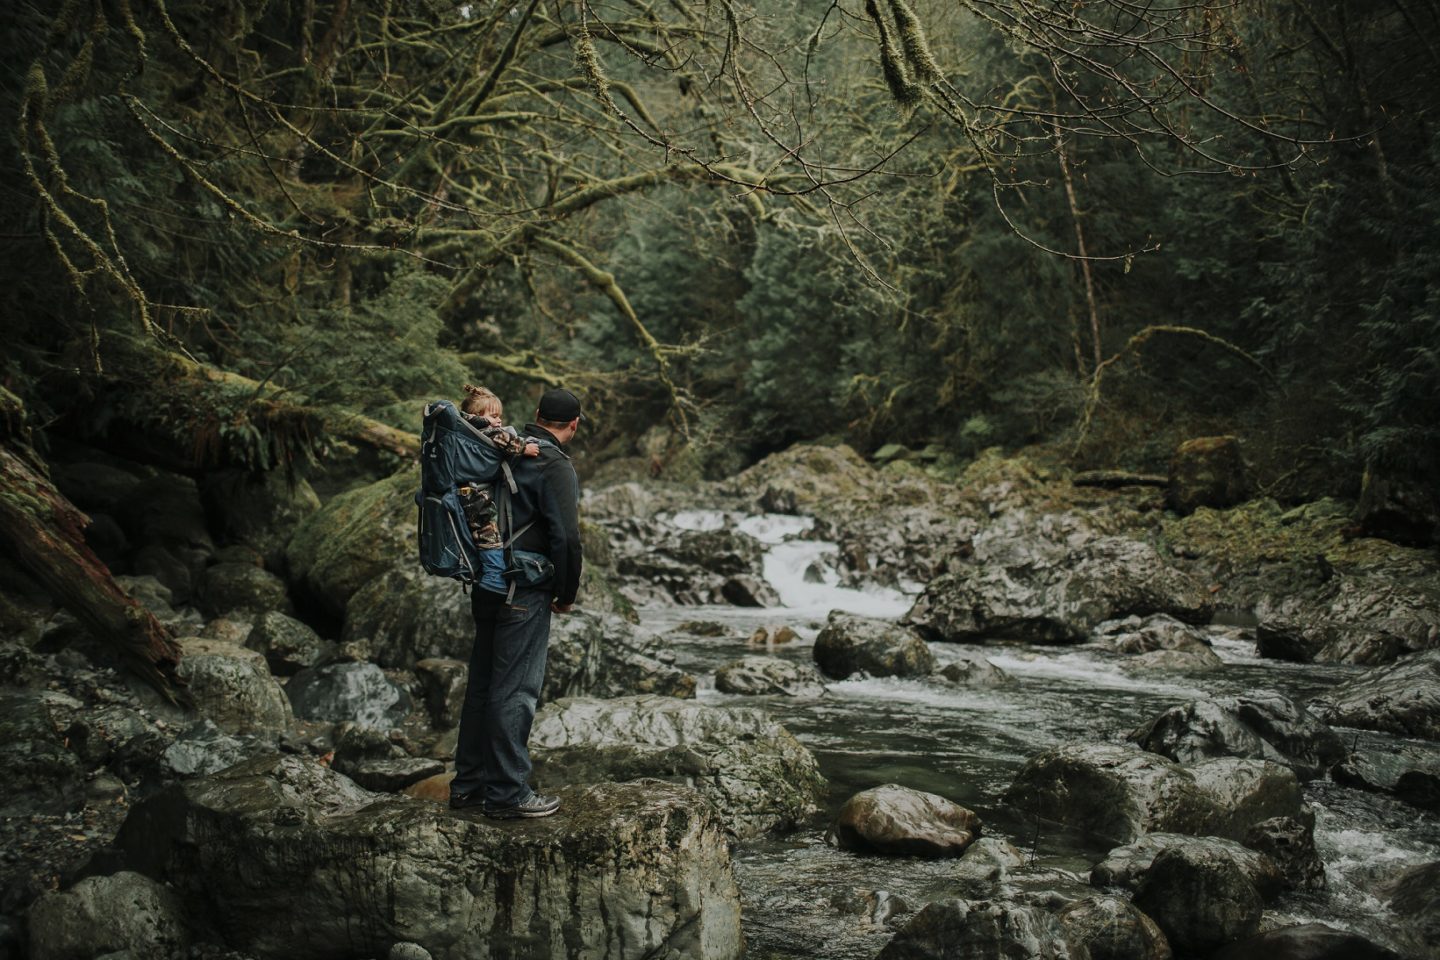
Finding a hard-frame carrier that fits mama (or daddy!) and her little one can be confusing and overwhelming to both those new to wearing and even those who are experienced wearers. Just like other types of baby carriers, hard-frame carriers vary between brand and model, making it hard to recommend the “perfect” or “best” carrier outright. Your best bet is to try on several and see which one fits you and your child best. However, there are some key features and guidelines that you should keep in mind when shopping for a frame carrier that might make finding the best fit for you easier. Here are some basic recommendations for hard-frame carrier safety and fit. Keep in mind these fit and feel differently than soft-structured baby carriers (which come with belts and buckles and sits baby close to your body). How to find the right fit with a frame carrier by Samantha Reddy for Hike it Baby

Fit for the wearer

  • While it's important to keep baby close and tight to your body at all times (as with a soft-structured carrier), frame carriers are designed to carry baby slightly away from your body to keep you cool while hiking and allow more space to carry supplies. As long as your baby is secured in the harness properly, they are safe — even if they are not directly in contact with your body. This will feel strange if you are used to soft-structured carriers where you feel baby’s every move.
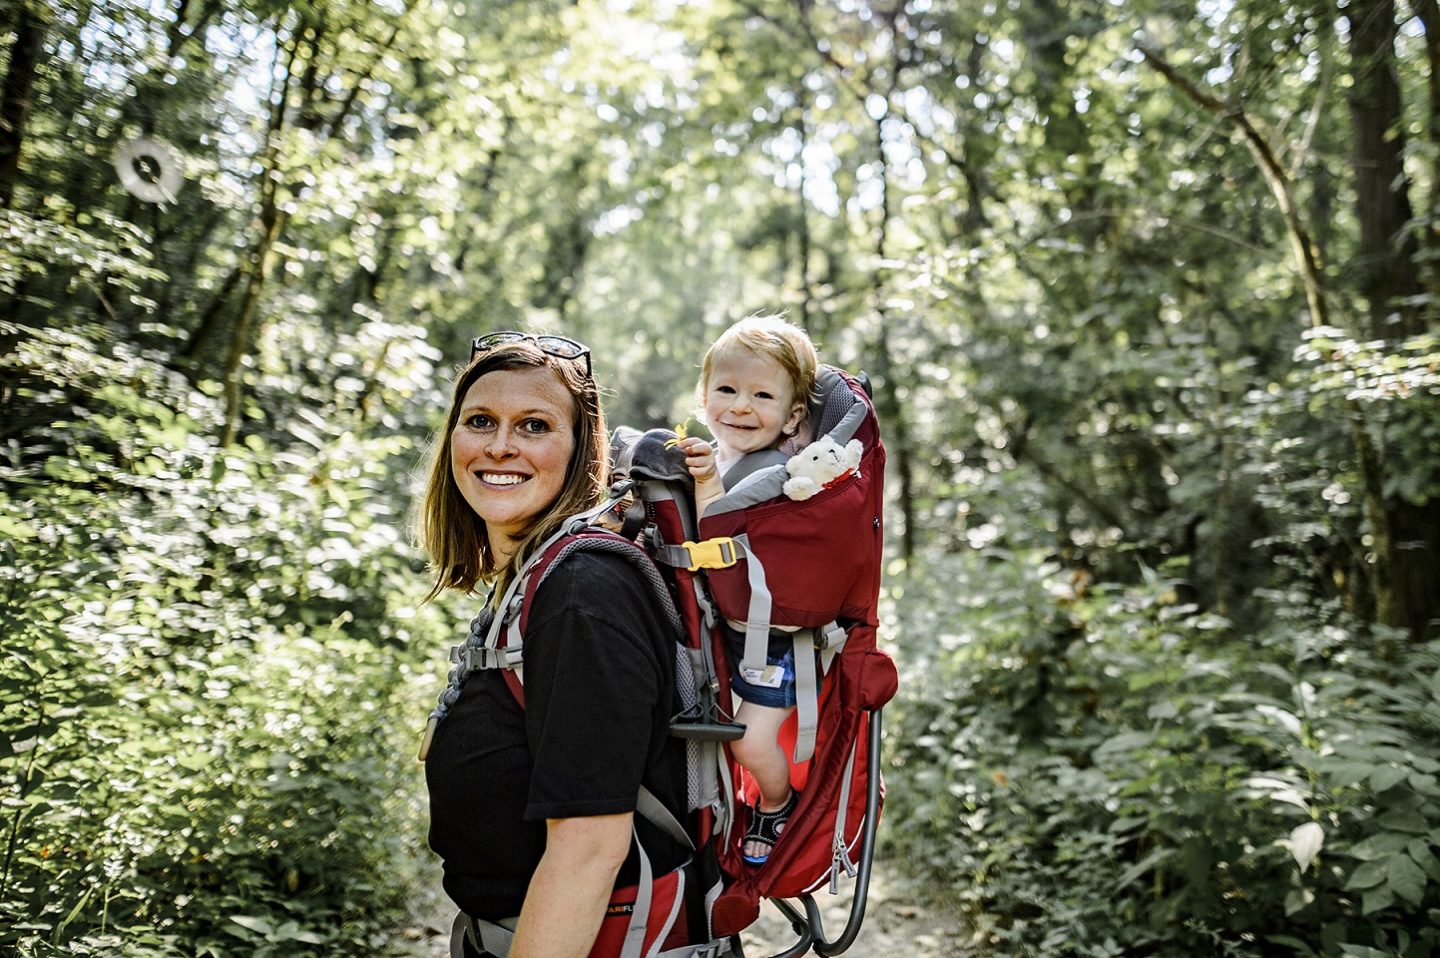
  • Torso length fit is the single most important aspect of hard-frame carrier fit. I cannot stress this enough. The proper length pack will place the waist and shoulders in the proper places, allowing even distribution of the pack’s weight and will be the most comfortable for you. If it's too long, it will result in improper waistband placement or shoulder gaping. Too short will result in waistband digging into your stomach or pinching on your shoulders. Either way, who wants to hike with leg or shoulder pain?
  • These carriers are designed for the waist belt to sit directly on your hips at the joint. This may feel strange if you are used to a buckle carrier that sits on your natural waist (although some buckle carriers are designed to sit on your hips as well). Direct pressure from the carrier being too low on your hip joint can add stress and drag to your legs, making it harder to hike. If you are not used to the fit and design of hiking with a pack, this could become painful after a while.  Wearing a hard-frame carrier at your natural waist will place the carrier too high on your back, making it too top-heavy. This will place all the weight on your upper back and can become painful very quickly.
  • The shoulder straps should sit firmly on your shoulders. Any gap can add strain to your upper back, quickly becoming uncomfortable. A gap in the strap is not necessarily unsafe, but comfort on a long hike is the goal.
  • These carriers are not cheap, so there is no point in settling for a carrier that sort of fits. It may also be important to point out that hard-frame carriers may not be as easily interchanged between caregivers. It will help to determine who will do the majority of the babywearing while hiking before making the purchase. Take the time to find a carrier that fits properly and you will be very happy.

Fit for the wearee

  • There is some concern over baby being in a seated position in the harness, rather than a spread-squat with knees higher than their bum. This issue is similar to the narrow base carrier debate. A seated position will not cause your baby to have hip dysplasia or other musculoskeletal issues. If your baby has no known issues, they will be just fine. If your child does have a known hip or other issues, then you should consult with their physician before using a hard-frame carrier.
  • Hard-frame carriers are for babies who sit upright unassisted. The harness will not provide enough support on its own. The leg passes in most cockpits are too wide to be comfortable for smaller babies and newborns. And there are no infant inserts or hacks to make the carrier safe before this milestone.
  • Make sure the harness fits against baby at all times. If by chance you fell, this keeps your baby from being thrown from the carrier. Think of them like a car seat harness built into your carrier. You want the strap snug with very little gaping (but not so tight it is hurting them). Make sure every buckle or clip is securely clicked into place. If the seat height adjusts, make sure it is the proper setting for your child. You want baby’s head to clear the front of the cockpit and shoulders below the back of the cockpit. For toddlers or preschooler, shoulders below the back is not a major safety concern, but ideal. Just make sure they are not so high up they can lean back and tip you over or fall out. Legs should be able to move freely and bend easily at the knees. Baby should be able to move a bit for comfort, but in general not be able to wobble over or jump side to side. If this is the case, you will need to adjust the width of the cockpit if possible (most have straps that tighten the harness widthwise).
  • Please keep the weight limit of the carrier in mind. It varies between carriers, so please check the manual. The weight minimum guideline for when baby might be able to fit properly in the harness does not replace the guideline that baby needs to be sitting unassisted. For example, the minimum might be 16 lbs., which my son hit at about 4 months old but he was nowhere near ready to sit up unassisted yet. It would not have been safe to place him in the carrier just because he reached the weight minimum. Likewise, if your child is over the weight limit for the carrier, it is not safe for them to be worn in it. They may be  secure in terms of fit, but you run the risk of over stressing the carrier and causing the frame to break. Your child could then fall out or be injured from the broken carrier. There are carriers with higher limits suitable for heavier toddlers or preschoolers though, so you can always upgrade as your child grows.
How to find the right fit with a frame carrier by Samantha Reddy for Hike it Baby

General Safety Tips

  • The general rules of babywearing apply, even though hard-frame carriers fit differently. Please do not do anything on the trail you would not do holding your baby. Wading across a shallow, slow-moving creek is just fine. A large, deep river with swift current is not the best idea. Taking off the carrier with baby secured in it and handing it to a fellow hiker on the other side of a fallen tree is fine too. Tossing the carrier with baby in it up a cliff to your partner, however, is not a good idea. Just use common sense and keep baby safe at all times.
  • Hard-frame carriers are only suitable for back carries. They simply will not work for front or hip carries. The torso of the pack will not fit comfortably over your front and the cockpit will block your line of sight entirely. As for hip carries, there is no real logical way to get the carrier to sit securely on your hips. Unlike soft-structured carriers, like a wrap or mei tei, they will not mold to your body shape. The straps cannot be crossed over to secure the carrier to your torso.
  • Baby can only face forward in the cockpit as well. Mainly because the harness is not designed to work any other way. Facing forward also allows you to see your baby easily. You can check that they are safe, breathing and generally happy.
  • Please keep in mind that the weight limits for the carrier include the weight of your child PLUS any gear you're taking. For example, the weight maximum might be 45 lbs. If you have a 30-lb toddler, 5 lbs of water and 20 lbs of camping supplies, that’s 55 lbs of total weight and you are over the limit and run the risk of the carrier failing.
In general, if you are used to soft-structured baby carriers, hard-frame carriers might take some adjusting to get used to. Keep in mind they are designed by companies that specialize in hiking and camping equipment, not baby carriers. They are perfectly safe and compliant with the Juvenile Product Manufacturers Associate regulations. If you're considering taking your baby out into nature, hard-frame carriers are a great option. Please take your time and try on as many as you can before you buy. Don’t just settle for an “okay” fit- find one that is truly comfortable. Your hips and shoulders will thank you! Also, keep in mind that they may not be the best option for you. But don’t let that discourage you from babywearing while hiking. Soft-structured carriers that can mold and adjust to your body hike just as well. Just find the carrier that fits you best and get out on the trails! What frame carrier do you use to get your little out on trail? Please share in the comments below!

Read more

Photos by Ashley Schneider and Laura Castro. How to find the right fit with a frame carrier by Samantha Reddy for Hike it Baby

Community tags

This content has 0 tags that match your profile.

Comments

To leave a comment, login or sign up.

Related Content

0
How to tandem babywear while hiking
More children means more trail buddies. The joy on their sweet little faces as they see the wonders of nature around your family. However, more children also means more tired little legs. You may need to enter the realm of tandem babywearing – wearing two children in carriers at once. Here are some general tandem wearing tips to get you started. 1. As always, the general rules of babywearing apply. If you would not do an activity while holding multiple babies, then it’s probably not a good idea to do it while tandem wearing. For example, climbing up a steep cliff. 2. The safest recommendation is one carrier per child. And each carrier should be secured independent of the other. This also means no crossing straps or tying one carrier to another. That way, you could safely remove one child quickly if needed without the risk of the other falling out. 3. Make sure both children meet the general height and weight limits of their carrier. This will ensure both you and babies are comfortable and well-supported without the risk of falling. 4. Make sure you are comfortable using each carrier independently first before trying them together. You need to be able to prep them, place baby on your body, secure the carrier and remove baby safely on your own. 5. Keep in mind that two babies/kids mean double the weight. Make sure you can physically carry that much weight before you head out on the trail. A mile into your hike is a bad time to realize that both kids are too heavy! Try it out at home first. Your living room or backyard is the perfect place to practice securing both children in the carriers. Take a short stroll around the room or neighborhood to ensure you’re comfortable and stable. Ways to tandem wear on the trail Babies of the same size For newborns, it is best to invest in a carrier that is designed for multiples. Many of these models are specially designed to fit newborns and will be the easiest way to get the proper fit for tiny babies. Please note that most twin carriers are designed to wear both newborns on the front only. This is the safest place for small babies, especially from first time wearers. And remember that babies need to be faced inward, but ensure their airways aren’t obstructed. Once babies get bigger, especially when they are sitting upright unassisted, you can try almost any two carriers you like together. The most common option is two soft-structured carriers, like The Extend from Easy Feel Products. Adjustable carriers, like The Extend, are also a wonderful choice for hiking with babies because the carrier grows with baby. The body panel adjusts in height and width to provide support and keeps baby snuggled from newborn to toddler. With practice, soft-structured carriers are easy to put on and adjust. Make sure both carriers function independently, so stagger the waistbands around your waist, one on top of the other, and ensure you can access both buckles and all shoulder straps easily. Toddlers of the same size As babies grow into walking toddlers or preschoolers, you’ll probably tandem wear less so you may be able to get away with just one carrier on a hike and rotate each kid as his legs get tired. But, there will probably be times when both kids will want to be carried too. Soft-structured carriers once again are a great choice, as they have more padding and internal structure to hold up more wiggles – especially from two kids. Keep in mind that those little legs may want back down again on the trail – and often – so try wearing the kiddo who usually wants down first on the front and place that carrier’s shoulder straps on the top. That way it’s a quick slide down your front and you don’t have to fight with trapped shoulder straps. Baby and toddler Whether hiking with siblings or you’re helping another parent during a hike, there may be times when it’s necessary to carry two kids of different sizes and weights. We recommend making it as easy as possible. If you have a newborn or infant, using a stretchy wrap on the front is convenient for taking baby in and out for diaper changes and feeding. Then you can wear any carrier you like on your back for the older child. Just make sure you put the wrap on first (even before you put baby in) so that way the back carrier is on top so the older child can go up and down as needed without disturbing baby. Once your baby can sit upright unassisted, you can put either baby or toddler on your front or back and use any carrier you’d like! The best recommendation is still to wear the child who will want down the most on the front. However, keep in mind that it might be more comfortable to have your bigger child on your back. But keep in mind that testing out different positions and carriers at home before you hit the trail is your best bet for a successful tandem-wearing experience on the trail. Share with us what you love about tandem wearing to encourage and inspire others to do the same. Read more: Tandem babywearing tips - How to carry two small hikers Tandem babywearing on trail - Tips and Tricks Photos by Ashley Scheiber. This post was sponsored by Easy Feels Products.
0
Tandem Babywearing Tips - How to Carry Two Small Hikers
Whether your own family is growing, you have twins or you’re helping out a friend by watching their child, adding another heartbeat to your hiking routine can be a challenge. But rather than stressing about it, know you have options for getting out on a fresh-air adventure with everyone. On stroller-friendly trails, a double all-terrain stroller – or wearing one child and pushing one (or two) children – is a great option. But in the cases where you want to get farther out into nature, you’ll want to tandem carry. If you’ve only ever worn one child at a time, wearing two at once will be an adjustment. There are lots of things to consider: Age of your children, mobility level, how they’ll want their snacks and last, but most important, your own comfort. We’re here to tell you that it’s totally doable and can be a lot of fun, so here are some helpful tips on how to tandem babywear your smallest hikers more efficiently! Photo by Kim Ives Tandem Babywearing Tips 1. Carriers Yes, that’s carriers. Plural. It makes sense: two children, two carriers. There are a few notable exceptions like the TwinGo, which is designed to carry two children. Otherwise, plan on one carrier for each child. The type of carrier is up to you, but the most popular way to wear two children at once are using either soft-structured carriers like the Onya Baby or woven wraps. We’ve seen people mix and match on the trail and, ultimately, it’s up to you. But if you’re new to carrying two, consider a soft-structured carrier simply for ease of using a buckle on and off. 2. Loading Them Up The “standard” rule of thumb is one kiddo on the back and one on front. Typically, the heavier child will go on the back and the lighter on the front. You’ll want to load the back child first to avoid jostling the smaller front-carried baby. And, if both kiddos are the same age/size, you’ll want to ensure that the smaller child is old enough to ride on your back (typically 6 months or so with good head control, but, again, contact your local babywearing expert if you need assistance with determining this). Once the child on the back is securely in place, add your front child. Tip: If you have an older child in back who likes to get up and down, an option is to strap that child in second for convenience. Natalie Kendrach includes a tip on how to do it successfully when you're alone with no one around to help: I personally prefer putting the baby on first so that I have the toddler’s carrier on top (for easy up and down). I put the carrier hood in my teeth to support the baby’s head when doing that method. That allows me to use the ‘Superman’ toss to get my toddler on my back. But when others are there, they just lift her to my back. 3. Get Help Some ideas for getting the kiddos on board include using the back of an SUV or a picnic table to get loaded. But there's no substitute for a friend’s help, so if you're hiking with friends, wait until you have them nearby in case you need assistance whether that’s holding a child, keeping watch on an escape artist or helping with knots or buckles. 4. Clothing and Gear You have an extra body with extra body heat, so you’ll want to keep that in mind in your own layers, potentially wearing one less layer. If it’s summer, you’ll have twice the amount of straps on your shoulders, so you may want to consider a tee shirt instead of a sleeveless top. Also, if you use cooling towels, you’ll want to have an extra on hand! For your kids, you’ll want to utilize standard layering/clothing considerations. If in winter, you’ll want to dress your children in appropriate winter layers (more on this here). If in summer, wicking material will be your – and their – best friend. Hiking poles  –  If wearing one child throws off your stability and balance, then two will do so equally. Hiking poles are a great idea anytime you’re hiking with kids, but especially when you’re carrying tandem. Quality shoes  – Having great shoes is always important when getting out, but again, especially so when tandem carrying. See this article for tips on finding the right shoes. Photo courtesy of Natalie Kendrach 5. Snacks & Water If you have ever done anything with a toddler, you know that snacks are critical. In fact, many of us would consider it an emergency to not have snacks at the ready. With this in mind, consider how you’re going to carry snacks and other important things like a phone and car keys. (See how high snacks rank?) Remember, you’ll have limited access to your pockets. Water is also top priority, as you’ll want to keep yourself AND the kids hydrated. Here are options for carrying snacks and water: The carrier itself Your carrier may have pockets designed for storage. Just make sure the items you need the most access to are in the front carrier so you can more easily get to them. Otherwise, that friend that helped you load up will need to get them out of the back carrier. Attached to the carrier Using a carabiner, you can attach a snack cup to your carrier so your kiddo can help themselves. However, if you have two snackers, you may want to be in control so one doesn’t end up with fewer snacks. In my experience, it’s tough to have too many carabiners out hiking. This isn’t quite as easy for water, but it can be done! Another option for attaching to the carrier is a pouch like the Onya Hipster pouch. Think of it like a waist pack that slides on the carrier strap instead of another strap around your waist. It's big enough to hold the essentials without being clunky and in the way. Waist pack A waist pack, the new hip way to say “fanny pack,” is a great way to carry extras. One of the best ways to wear them is underneath the back child, almost as a seat below the carrier. You can load these up with snacks and other essentials, and it doesn’t (theoretically) add much to your load. Some waist packs are also hydration packs. (Pro tip: if you have a child with new teeth and they chew through the valve you use to get water, purchase extra valves. In bulk.) Mesh cinch backpack These are awesome for wearing OVER the back carrier. The layering order for this is going to be back child/carrier first, then the mesh pack OVER the back of that carrier, then your front child in their carrier. You can load up this pack with snacks, other essentials and even a hydration bladder. The only challenge with a backpack is access. You'll need to stop to get items from the backpack, or ask a friend to help. 6. A Dry Run Last, but not least, a dry run is something you’ll want to consider. Try gearing up and loading up everything from snacks to kids in a comfortable environment, ideally your own home. That way you can get a solid feel for how it all pulls together, where you might need some help, and what is going really well. In the end, we just want to see you on a trail and hope you and your family have a great time! Read More Tandem Babywearing on the Trail - Tips and Tricks 10 Tips for Hiking with Toddler Twins We’d love to hear your experiences! Share your tandem carrying tips, tricks and questions in the comments below. Disclaimer: We are not babywearing experts, but we’ve done a lot of hiking with kids. These are some top tips we’ve discovered from lots of hiking with lots of families over the years!  ABOUT OUTGROWN OutGrown is a 501(c)(3) nonprofit that works to create a world where everyone can enjoy the physical and mental benefits of spending time outside. We are focused on creating opportunities and removing barriers to access so families with babies and young children can take their first steps outside. We believe all families have the right to connect with nature, benefit from spending time outdoors and be inspired to a lifelong love of nature. Since its grassroots inception in 2013, OutGrown is a growing community of 280,000 families and over 300 volunteer Branch Ambassadors. More information on all of our programs can be found at WeAreOutGrown.org    EDITORS NOTE: We hope you enjoyed reading this article from OutGrown. We’re working hard to provide our community with content and resources that inform, inspire, and entertain you. But content is not free. It’s built on the hard work and dedication of writers, editors, and volunteers. We make an investment in developing premium content to make it easier for families with young children to connect with nature and each other. We do not ask this lightly, but if you can, please make a contribution and help us extend our reach.